Key Takeaways
- DIY Solar Still Water System provides safe drinking water using sunlight and basic materials.
- It’s perfect for off-grid emergencies, survival kits, or camping.
- Removes salt, bacteria, and impurities from water.
- Easy to build with low-cost, accessible items.
- Works best in sunny, dry climates with proper setup.
- Not suitable for filtering chemical pollutants.
- Produces 0.5–1 liter per day per square meter.
- A smart, sustainable backup solution for clean water.
A Real Story From the Outskirts of Arizona
It was a blistering July afternoon in Arizona. Emma and her two kids were three days into a brutal power outage caused by a rare desert storm. The fridge was warm. The AC was dead. But the worst part? The water had stopped running. No notice. No help. Just dry taps and fear.
Emma had no backup filter. Bottled water had run out. But she remembered something from a survival class—a DIY Solar Still Water System. With a shovel, some plastic wrap, a cup, and patience, she managed to collect enough clean water from her backyard setup to keep her family hydrated. It wasn’t fancy, but it worked. The sun saved them.
1. What Is a DIY Solar Still Water System?
When access to clean water is lost, every drop counts. Whether you’re living off the grid, camping in the wild, or facing an unexpected emergency, knowing how to make your own clean water could save lives. That’s where the DIY Solar Still Water System comes in.
This simple yet effective setup uses the power of sunlight to turn dirty or salty water into drinkable water—without electricity or chemicals. It mimics the Earth’s natural water cycle by evaporating moisture, trapping the steam, and collecting it as pure, clean water.
You don’t need high-end tools or complicated parts. With just a few basic materials, anyone can build a solar still at home, even on a tight budget. It’s not just a clever hack—it’s a life-saving tool in times of crisis.
The Concept: Turning Sunlight into Survival
A DIY Solar Still Water System works by using three basic principles:
- Evaporation – The sun heats up dirty or salty water, turning it into steam.
- Condensation – The steam hits a cool surface (like plastic), condensing back into liquid form.
- Collection – The clean water drips into a container, leaving behind salt, dirt, and bacteria.
It’s simple science—but incredibly powerful. Just like clouds forming rain, this still captures pure water vapor, free from most harmful substances.
This method is especially helpful during natural disasters, droughts, or off-grid living, where tap water isn’t an option and clean rivers or filters are unavailable.
Why Solar Distillation Works in Any Weather
You might think a solar still only works on hot summer days. But it doesn’t need extreme heat to do its job. It works in:
- Cloudy weather
- Cool but sunny mornings
- Desert heat and dry winds
As long as there’s sunlight, you’ll get some water. The longer it works, the more water it makes. That’s what makes it perfect for long-term emergencies or daily use in remote areas.
Even in cooler climates like Montana or northern Michigan, you can still collect moisture—especially if you set up your system early in the day and give it time to do its work.
Solar Still vs. Filtration – What’s the Difference?
Many people ask: Why not just use a water filter or purifier? That’s a great question. Here’s the difference:-
| Feature | Solar Still | Water Filter |
| Power Needed | None | Some require batteries or pumps |
| Removes Salt | ✅ Yes | ❌ Most don’t |
| Kills Bacteria & Parasites | ✅ Yes (through evaporation) | ✅ Some do, some don’t |
| Portable | ❌ Not easily portable | ✅ Very portable |
| Produces Water from Soil | ✅ Yes (moisture in soil/vegetation) | ❌ No |
| Cost | Low (DIY materials) | Medium to high (depending on type) |
Filters are great for quick results, especially if you’re on the move. But for long-term, off-grid water generation, nothing beats the independence of a DIY Solar Still Water System. It uses no chemicals, no cartridges, andlasts forever with proper care.
2. Why You’ll Need a Solar Still Off the Grid
Most people don’t think about clean water—until it’s gone. In a true emergency, the need for safe drinking water becomes immediate. Without it, survival gets harder by the hour. That’s where the DIY Solar Still Water System proves its real value.
Drought, Disasters, and Water Contamination
From wildfires in California to hurricanes in Florida, Americans face all kinds of natural disasters every year. Often, these events knock out power and water lines at the same time. The tap runs dry. Wells stop working. Bottled water disappears from store shelves.
In these moments, your best backup isn’t high-tech. It’s smart planning.
A solar still doesn’t rely on power, plumbing, or delivery trucks. It uses sunlight, which is always available—even during blackouts. This low-tech system gives you one thing that’s absolutely priceless: self-reliance.
During floods or chemical spills, surface water becomes contaminated. It might look clean, but it can still have dangerous germs, chemicals, or parasites. Boiling helps, but only if you have fuel or electricity. A solar still, on the other hand, can pull clean water from contaminated sources using only heat and plastic.
Real-Life Scenarios: Hurricanes, Blackouts
Let’s break it down with real U.S. examples:
- Texas Winter Storm (2021): Power grids failed. Water treatment plants froze. Boil notices were issued for days. A solar still could’ve helped many.
- Hurricane Ian (2022): Florida neighborhoods were cut off. People had to rely on rainwater and stored jugs. A DIY Solar Still Water System could provide a steady flow of clean water during recovery.
- California Wildfires: Ash and debris contaminated well water and reservoirs. A solar still would remove these particles naturally through evaporation.
When you’re off-grid—whether by choice or necessity—you need a system that doesn’t break, doesn’t run out, and doesn’t cost money to refill. That’s what this still offers. And it’s not just for emergencies. Many off-grid families use it daily to purify creek water, snowmelt, or even plant moisture.
“When Hurricane Harvey hit, my entire water supply was gone in 48 hours. My solar still kept me going until help arrived.” — Mike G., Texas prepper
Why Survivalists and Preppers Rely on It?
People who live off the grid aren’t just doing it for fun. They’re planners. They prepare for long-term challenges—food, heat, and especially water. Ask any experienced homesteader or prepper, and they’ll tell you the same thing: clean water is always your first priority.
That’s why many of them install multiple DIY Solar Still Water Systems across their land. Some even build larger versions with mirrors or reflective panels to boost the water output. It’s not just smart—it’s sustainable.

3. What Materials Do You Need to Build One?
Building a DIY Solar Still Water System doesn’t require fancy parts or engineering know-how. In fact, most of the items you’ll need are already lying around your home or can be found at a local hardware store for just a few dollars.
Let’s go over the basic materials, why they matter, and what alternatives you can use. Whether you’re prepping for a storm or living off-grid, this part helps you get ready smartly.
Your Essential Materials List
To build a simple, effective solar still, here’s what you’ll need:
- A shovel – for digging a pit.
- Clear plastic sheeting (at least 3×3 feet) – to trap solar heat.
- A container or cup – to collect the purified water.
- A small rock or weight – to create a low point in the plastic.
- Green plant material or moist soil (optional) – You can also add wet soil or green leaves to make the pit more humid.
- Plastic tubing (optional) – to sip water without disturbing the setup.
- Duct tape or clips (optional) – to secure the plastic edges, especially on windy days.
These materials are chosen not only for their effectiveness but also for how easily they can be sourced, even in an emergency situation.
Table: Solar Still Materials – Use, Cost, and Alternatives
| Item | Purpose | Estimated Cost | Alternative |
| Clear plastic sheet | Traps sunlight, enables condensation | $2 – $12 | Clear shower curtain, painter’s tarp |
| Small cup or bowl | Collects clean water | $1 – $3 | Metal mug, plastic container |
| Shovel | Digs the pit | $10 – $15 | Hands (harder), large spoon |
| Rock or small weight | Weighs down the plastic center | Free | Any small object (screw, dirt clump) |
| Green leaves/soil | Adds moisture to speed evaporation | Free | Wet grass, fruits, wet clothing |
| Tubing (optional) | For direct drinking without opening the system | $3 – $7 | Straw, aquarium tubing |
| Duct tape (optional) | Seals plastic edges for stronger setup | $4 – $6 | Heavy rocks, sand, wood sticks |
Tips for Sourcing in Emergencies
If you’re in an off-grid emergency or a bug-out situation, you might not have access to stores. That’s okay. Here’s how to adapt:
- Use discarded plastic packaging (even from food wrap) if it’s clear.
- Dig with flat rocks or broken metal if you don’t have a shovel.
- Use aluminum cans or plastic water bottles as your collection cup.
- For added moisture, use any wet organic matter you can find—vegetation, soaked clothing, or even breath moisture in sealed setups.
Remember, the key ingredient isn’t fancy gear—it’s sunlight. The rest is just making the most of what’s around you.
“We didn’t have much after the fire, but we used a plastic sheet and an old soup can to build a solar still. It saved us.” — Karen H., wildfire survivor
Simple, Affordable, and Reusable
Unlike filters that need replacements or batteries, once you build this system, you can use it again and again. Just clean the plastic, dry out the pit, and set it up again. That’s what makes it ideal for daily use or long-term emergencies.
4. How to Build a DIY Solar Still Water System (Step-by-Step)
Let’s walk through the exact steps to build a simple but effective DIY Solar Still Water System—perfect for backyards, campsites, or even emergencies on the road.
Step 1: Choose a Sunny Spot
Pick an area that gets direct sunlight for at least 5–8 hours a day. Stronger sunlight makes evaporation and condensation work better. If possible, avoid following:-
- Shady areas under trees
- Low-lying flood-prone spots
- Rocky soil that’s hard to dig
If you’re using moist soil or vegetation as your water source, select a spot with damp dirt or green plants.
Step 2: Dig a Pit (The Right Size Matters)
Use your shovel (or hands, if needed) to dig a bowl-shaped pit about:
- 2–3 feet wide
- 1–2 feet deep
Make sure the bottom of the pit is smooth, and the sides slope inward—this helps keep the plastic tight and focused over the collection cup. You can also line the pit with wet leaves, grass, or even urine-soaked soil if needed. The more moisture, the more vapor you’ll collect.
Step 3: Place the Collection Cup
Place a clean container or cup in the center of the pit. This is where the purified water will drip into. Important tips:
- Don’t let dirt fall inside the cup
- Center it exactly so the drip lands directly in it
- Make sure it’s stable and upright
Step 4: Cover the Pit with Clear Plastic Sheeting
Now, stretch your clear plastic sheet tightly across the pit. Make sure the plastic doesn’t sag too loosely or touch the cup. Secure the edges with:-
- Rocks
- Sand
- Duct tape (if available)
Next, place a small rock or weight directly above the cup on top of the plastic. This creates a low point so that condensed water drips down into your container. Make sure the plastic is tight enough to form a “tent” and weight is centered right above the cup.
Step 5: Wait and Collect Your Water
Now, let the sun do the work. Over the next 6–10 hours, moisture inside the pit will evaporate, rise, hit the plastic, condense, and drip into the cup. Check your system once a day. Avoid lifting the plastic too often or you’ll lose steam and heat.
Add Tubing for Easy Drinking (Optional)
If you have plastic tubing, run it from the cup to the outside of the pit before sealing. That way, you can sip directly from the cup without opening the plastic each time. This is useful if you’re trying to keep the heat trapped or building multiple stills and want easy access.
Table: DIY Solar Still Build Steps – Time, Tools, Tips
| Step | Estimated Time | Tools Needed | Important Tip |
| Pick a sunny spot | 5 minutes | None | Choose an open area with no tree shade |
| Dig the pit | 15–30 minutes | Shovel or hands | Sloped walls help with condensation flow |
| Place collection cup | 2 minutes | Clean container | Ensure it’s centered and stable |
| Cover with plastic sheet | 5–10 minutes | Plastic sheet, rocks | Keep the plastic tight and angled |
| Add center weight | 1 minute | Rock or small item | Drips should land in the center of the cup |
| Let it run | 6–10 hours | Sunlight | Don’t open it too soon—let it run full cycle |
Troubleshooting Common Mistakes
If your still isn’t producing enough water, here’s what to check:
- Plastic is too loose? Tighten it to improve condensation flow.
- Cup not centered? Water may be missing the cup entirely.
- Not enough sunlight? Try relocating to a better-lit area.
- Condensation not forming? Add more moisture (wet leaves, urine, etc.) to the pit.
Safety Reminder
Always test the collected water before drinking, especially if your source was chemical-heavy soil or polluted water. A solar still removes bacteria, salt, and parasites, but may not remove some chemical contaminants. When in doubt, use purification tablets too.
🏷️ BuySmart – Water Extraction Guides
Your trusted survival partner – BuySmart – also presents the valued readers the following guides which will help you in water production, safety and filtration to make the disaster more easier for you. You can explore these guides also in BuySmart Emergency Survival Hub. Also, these guides come with 60-day money back guarantee. Here are these:-
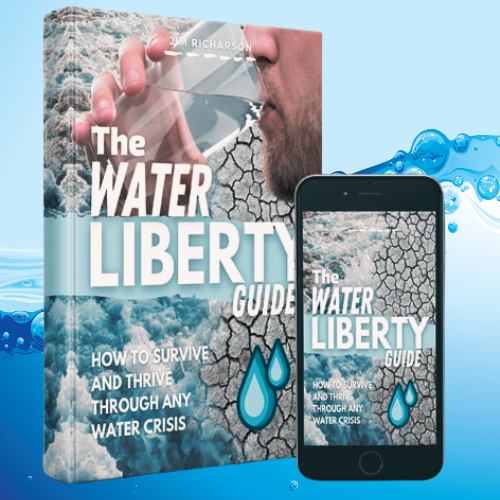
🚰 Water Liberty Guide
The Water Liberty Guide is an innovative survival guide that teaches you how to extract water from air using a simple DIY system. It requires no expensive materials or electricity, making it a cost-effective solution for water independence. With step-by-step instructions, diagrams, and material lists, anyone can set up the system at home. The method works in various climates, producing up to 10 gallons of water daily. It is a one-time investment with minimal maintenance.
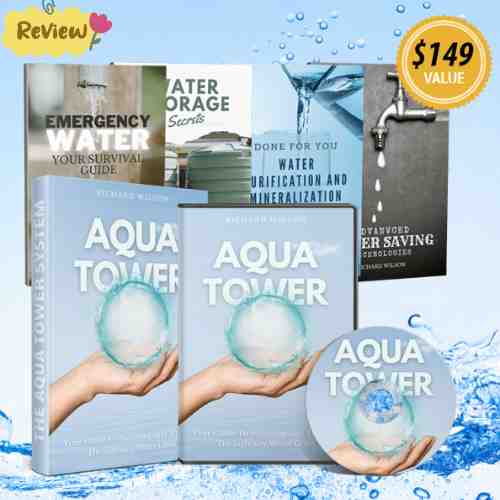
🌧️ Aqua Tower Guide
The Aqua Tower is a revolutionary, portable water generator that extracts clean, fresh water from the air. Designed to be affordable and easy to build, it costs less than $200 and requires no technical skills. Perfect for emergencies, droughts, or everyday use, it produces up to 60 gallons of water daily. The system is lightweight, off-grid, and eco-friendly, making it ideal for homeowners, preppers, and travelers.

💧 Air Fountain System
The Air Fountain system is a groundbreaking device designed to harvest water from the air. It’s perfect for anyone looking for a sustainable and reliable water source. This innovative system works by capturing humidity from the atmosphere and converting it into fresh, clean water. Ideal for homes, survivalists, and eco-conscious individuals, it’s easy to install, low maintenance, and scalable to meet varying water needs.

🧪 Testing the Water Quality – Is It Really Safe?
After putting in all the work to set up your DIY Solar Still Water System, the big question is: Is the water truly safe to drink? In most cases—yes. But knowing how to test it gives you peace of mind and keeps you protected, especially in survival scenarios. Let’s break it down into what to look for and how to test the water, even without lab gear.
Visual Checks: What to Look For First
Before you sip, give the water a quick visual inspection. It should look:
- Clear, not cloudy
- Free of floating debris
- No green or black tints
- No slimy texture
If the water looks murky or has color, do not drink it. That may mean the condensation setup failed or contaminants made it into the cup.
Smell Test – Nature’s First Alert
Next, take a gentle sniff. Pure distilled water should smell like… well, nothing at all. If you notice:
- A chemical or plastic smell – It could be from cheap plastic sheets. Try rinsing them before use.
- A rotten or foul odor – That usually signals bacteria or decaying plant matter inside the pit.
- A metallic or sour scent – Could be an indicator of heavy metals or acidic compounds. Avoid drinking.
These are warning signs that the water might not be safe—even if it looks clean.
Taste Test – Only If It Passes the First Two
If the water looks clear and smells neutral, try just a few drops on your tongue. It should taste:
- Slightly flat (since distilled water has no minerals)
- Odorless
- Mildly warm if fresh from the still
If you notice bitterness, a metallic tang, or unusual aftertaste, spit it out immediately and avoid drinking more.
Use Portable Test Strips (Optional but Helpful)
For those prepping for long-term emergencies, it’s smart to carry water test strips. These test for:-
| Contaminant | Test Strip Shows |
| pH Balance | Too low or too high? Not safe. |
| Chlorine | Should be zero in distilled water |
| Nitrates/Nitrites | High levels = agricultural runoff |
| Heavy Metals | Lead, mercury, arsenic |
| Bacteria & E. coli | Some advanced kits include this |
Most of these kits are compact, inexpensive, and available online or at hardware stores.
📌 External Resource: CDC Water Testing Tips
What If Not Sure? Use These Backup Methods
If something doesn’t feel right, take extra safety steps:
- Boil the collected water – A second level of protection against unseen bacteria.
- Use water purification tablets – Great for killing pathogens.
- Pass water through a carbon filter – Helps remove leftover chemicals or odors.
Even in off-grid settings, a little caution can save lives.
Table: When to Drink and When to Avoid
| Test Result | Safe to Drink? | Suggested Action |
| Clear, no smell, no taste | ✅ Yes | Drink freely |
| Cloudy or floating bits | ❌ No | Remake still or filter |
| Odd smell or aftertaste | ❌ No | Discard or boil/filter it |
| Test strips show imbalance | ❌ No | Treat with tablets or filter |
“Trust your senses first, science second. In survival, every sip matters.” — Jenna Alcott, Wilderness Medic & Outdoor Survivalist
Conclusion
In emergencies or off-grid living, clean water becomes your top priority. A DIY Solar Still Water System is a simple yet powerful tool that transforms unsafe sources into drinkable water using sunlight and basic materials. It’s cost-effective, eco-friendly, and incredibly practical when traditional supplies fail. From setup to testing, each step ensures your safety while keeping you self-reliant.
Whether you’re a prepper, camper, or cautious homeowner, this system prepares you for the unexpected. Remember—knowledge is survival. Take the time to build one, test your results, and trust the process. When disaster strikes, your smart decisions today could mean safe water tomorrow. Stay ready, stay safe, and always think ahead with confidence.
❓ FAQs (Frequently Asked Ques)
A DIY solar still uses the power of the sun to evaporate dirty or salty water, leaving impurities behind. The vapor rises, then condenses on a cool surface like plastic and drips into a container. This natural process removes bacteria, salt, and contaminants, giving you safe, drinkable water—perfect for emergencies or off-grid situations.
Mostly yes, but with limits. A solar still can distill dirty, salty, or non-potable water, including pond or seawater. However, it won’t remove chemicals like pesticides or heavy metals. It’s best used for biological contamination, not industrial pollution.
Output depends on sunlight, size, and climate. On average, a solar still makes about 0.5 to 1 liter per square meter per day. While it’s not a large amount, it’s enough for survival hydration in emergency conditions when no other clean water source is available.
Use a clear plastic sheet, a clean container or bowl, dark material (like black plastic or cloth to absorb heat), and non-toxic tape or sealant. A sloped surface ensures vapor runs downward and collects efficiently. Avoid materials that give off harmful fumes or melt in sunlight.
Not quite. A solar still is a backup or survival tool—great in off-grid or emergency conditions. It’s low-cost and sustainable, but not fast enough for regular high-volume use. For long-term living, combine it with water filters or rain catchment systems.
🔗 External Resources
- CDC – Emergency Water Supply Guidelines
- EPA – Drinking Water Treatment Technologies
- Ready.gov – Emergency Water Supply Planning
- University of Florida IFAS – Solar Water Distillation Factsheet
- NASA – Water Purification Technologies
- Red Cross – Emergency Preparedness
- Survivalist Boards – Solar Still Build Discussions


[…] Learn more about DIY Water System. […]