Key Takeaways
- DIY Emergency Preparedness Kit ensures safety and self-reliance during crises.
- Cost-effective, customizable, and tailored to your family’s needs.
- Stock water, non-perishable food, first aid supplies, and tools like flashlights and multi-tools.
- Use airtight containers and store kits in cool, dry places.
- Shop at dollar stores, use coupons, and check thrift shops for supplies.
- Include bandages, antiseptic wipes, and necessary medications.
- Books like Home Doctor and Lost Frontier Handbook provide invaluable guidance.
- Regularly review and refresh your kit for optimal readiness.
Introduction: Why Being Prepared Matters
Did you know that 60% of Americans don’t have an emergency plan in place? According to FEMA, this lack of preparation can leave families vulnerable when disasters strike. Emergencies like hurricanes, earthquakes, or even power outages can happen without warning, and being caught off guard can be dangerous.
In these situations, having a reliable emergency preparedness kit can make all the difference. But here’s the good news – building your own DIY emergency preparedness kit doesn’t have to cost a fortune. You don’t need to spend hundreds of dollars on pre-made kits that may not even suit your specific needs.
Creating your own kit ensures you’re ready for anything. From stocking up on basic supplies like food and water to including tools and medical essentials, a DIY kit can cover all bases. Plus, it gives you the flexibility to choose items that are truly necessary for your family or situation.
By the end of this guide, you’ll know exactly how to put together a kit that’s not only effective but also affordable. Whether you’re a seasoned prepper or just starting to think about emergency preparedness, this guide offers simple, practical steps to ensure you’re ready – without breaking the bank.
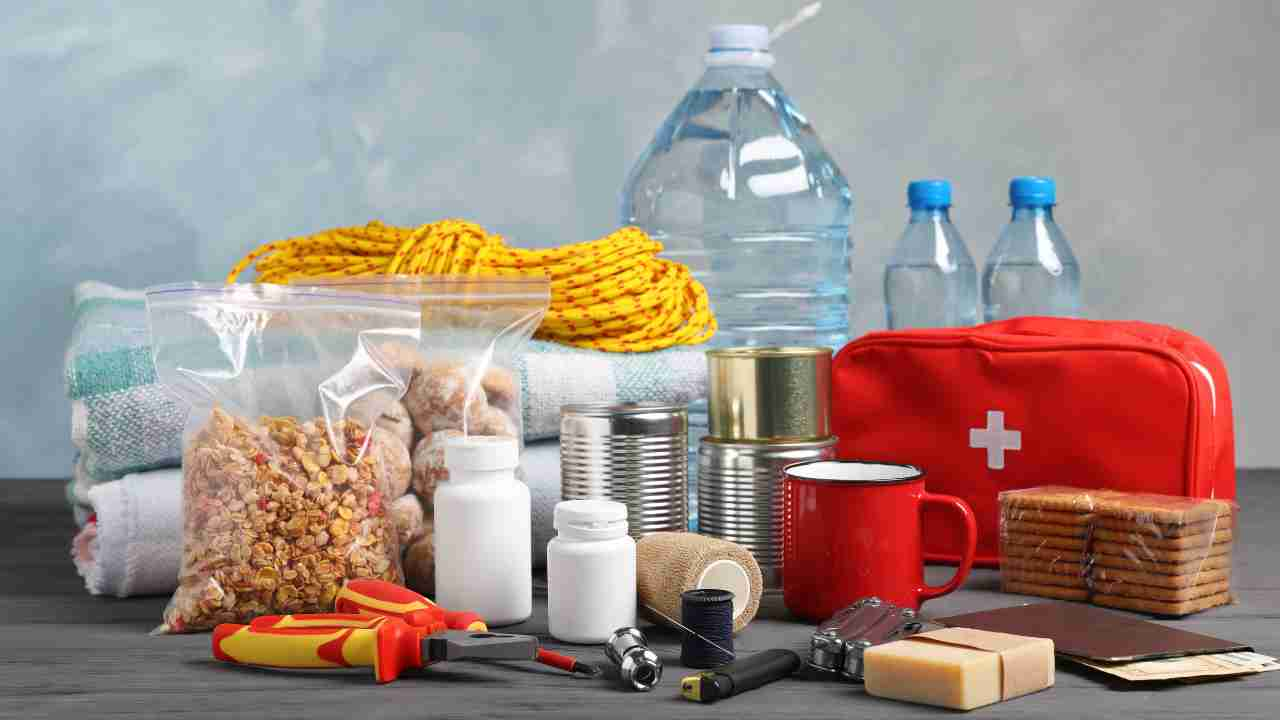
1. What is an Emergency Preparedness Kit?
An emergency preparedness kit is a collection of essential items that can help you survive and stay safe during unexpected situations. Whether it’s a natural disaster like a hurricane, an earthquake, or even a power outage, having a well-stocked kit can make all the difference. The goal of these kits is to provide you with the basics you need to stay alive and comfortable until help arrives or conditions improve.
In the United States, about 45% of households are not prepared for disasters, according to the American Red Cross. This lack of preparation can leave families vulnerable when disasters happen. That’s why having a DIY emergency preparedness kit is a smart and necessary step in ensuring your safety.
Key Components of the Kit
A well-prepared kit includes a variety of supplies that will help you meet your basic needs in case of an emergency. These supplies are divided into several key categories:
1. Water and Food
- Water: The average person needs at least one gallon of water per day for drinking, cooking, and sanitation. Water should be stored in durable, clean containers that are easily accessible.
- Food: Stock up on non-perishable foods like canned goods, granola bars, and freeze-dried meals. These foods don’t need refrigeration and have long shelf lives, which makes them perfect for an emergency kit.
2. First Aid and Medical Supplies
In emergencies, having a first aid kit can prevent small injuries from becoming serious. It should include:
- Bandages, gauze, and tape
- Pain relievers like aspirin or ibuprofen
- Prescription medications if needed
- Antiseptic wipes and ointments
3. Tools and Equipment
Basic tools can help you in many situations, whether it’s fixing something around the house or making a shelter. These tools should be lightweight and multi-purpose:
- Flashlights (preferably solar or hand-crank)
- Extra batteries
- A multi-tool (like a Swiss Army knife)
- A whistle (to signal for help)
4. Personal Items
This section covers items that are important for personal comfort and safety:
- Blankets or sleeping bags
- Clothing (appropriate for the season)
- Hygiene items (toothbrush, soap, etc.)
- A face mask for dust or illness protection
How Much Does It Cost to Build the Kit?
Building a DIY emergency preparedness kit doesn’t have to be expensive. In fact, you can put together a reliable kit for under $100 if you shop smart. The cost will depend on the items you need and where you buy them.
Table 1: Estimated Costs of Common Emergency Kit Items
| Item | Estimated Cost |
| 1 gallon of water (per person) | $1 |
| Canned food (per can) | $0.75 |
| First aid kit | $20 |
| Flashlight (solar or crank) | $10 |
| Multi-tool | $15 |
| Hygiene kit | $10 |
2. Why Build a DIY Emergency Preparedness Kit?
Creating your own DIY emergency preparedness kit comes with several key advantages over purchasing a pre-made one. Not only is it cost-effective, but it also allows you to customize the kit to fit your specific needs. Let’s dive into why building your own kit makes more sense for most families.
Cost Savings: DIY is More Affordable
One of the main reasons to build your own emergency kit is cost savings. Pre-made kits can cost anywhere from $150 to $200, depending on the brand and contents. These kits often include items that may not be necessary for your specific situation, which can make them an inefficient use of money.
On the other hand, a DIY emergency preparedness kit can be built for as little as $50. By choosing the supplies you need and avoiding extra, unnecessary items, you can save a significant amount while still being fully prepared.
Table 2: Cost Comparison – Pre-Made Kit vs DIY Kit
| Item | Pre-Made Kit Cost | DIY Kit Cost (Approx.) |
| 72-hour emergency food | $30 | $10 |
| Water (1 gallon/day) | $15 | $5 |
| First aid kit | $25 | $15 |
| Flashlight | $20 | $10 |
| Total | $150 – $200 | $50 |
As you can see, building your own kit can save you a lot of money without sacrificing quality or preparedness.
Customization: Fit Your Family’s Needs
When you buy a pre-made kit, it may not take into account your family’s specific needs. For example, if someone in your family has food allergies, the kit you purchase might not have safe options for them. Similarly, if you have young children or elderly family members, their requirements for comfort and care might not be met in a generic kit.
By creating a DIY emergency preparedness kit, you can customize it to fit your family’s unique situation. You can add:
- Special foods or snacks if you have dietary restrictions
- Medications or medical equipment if needed
- Baby supplies like diapers and formula, or pet food for your animals
- Additional comfort items such as books or toys for children
This level of customization ensures that every member of your family is cared for, no matter the emergency.
Hands-On Awareness: Be Prepared for Challenges
Building your own kit gives you a deeper understanding of what each item is for and how it can help in an emergency. This hands-on process makes you more aware of the potential challenges that could arise during a disaster. You’ll be better equipped to:
- Know where to find your supplies quickly
- Understand how to use each item in the kit
- Stay calm and solve problems efficiently during an emergency
This type of preparation also helps you anticipate any extra needs that might come up. For instance, you may realize that you need a manual can opener if you’re including canned food in your kit. By taking the time to build it yourself, you gain the confidence and knowledge that will help you during an actual emergency.

3. Essentials of a DIY Emergency Preparedness Kit
When creating your DIY emergency preparedness kit, two of the most important elements are food and water. These are the lifelines of survival, especially during emergencies where access to fresh supplies might be limited. Let’s take a closer look at the best ways to store and manage both food and water in your kit.
Water Storage and Purification: Essential for Survival
Water is essential for hydration, cooking, and even sanitation. In an emergency situation, it’s crucial to have enough water stored and methods in place to purify it if needed. FEMA recommends that each person have at least one gallon of water per day for both drinking and sanitation purposes.
This adds up quickly, so be sure to plan accordingly. For a family of four, you would need at least 4 gallons per day for all basic needs. Purification becomes even more important in extended emergencies. If your water source is compromised, it’s essential to have methods to filter or purify it.
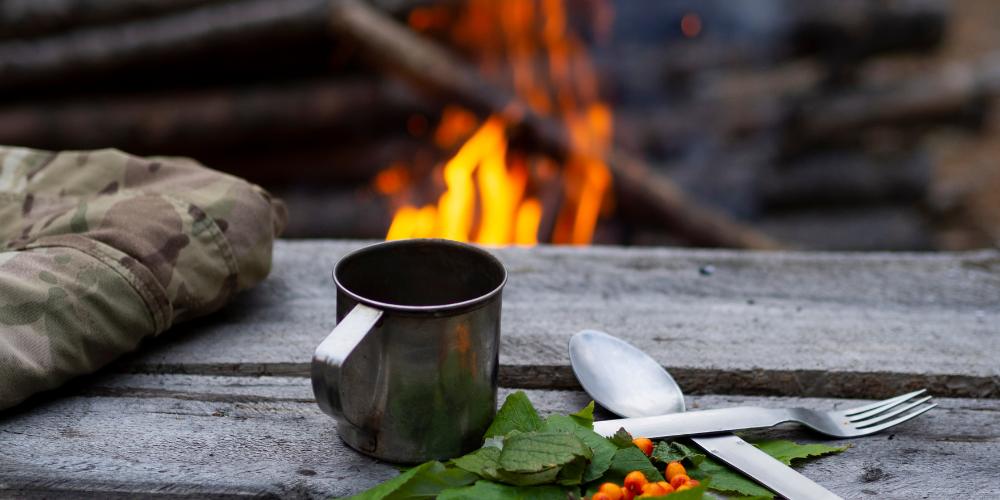
Water Purification Methods
There are several methods to purify water, each with its pros and cons. Here’s a breakdown of the most common options:-
Table 1: Water Purification Methods
| Method | Pros | Cons |
| Boiling | Kills bacteria and viruses | Requires a heat source |
| Purification Tablets | Lightweight and portable | May leave a chemical taste |
| Portable Filters | Easy to use and efficient | Limited lifespan |
- Boiling: The most effective way to kill harmful bacteria and pathogens. It requires a heat source like a camp stove or fire.
- Purification Tablets: These are portable and lightweight, making them ideal for on-the-go purification. However, they can sometimes leave an unpleasant chemical taste in the water.
- Portable Filters: These are easy to use and can be a reliable solution for filtering larger amounts of water. However, they have a limited lifespan and need to be replaced after a certain number of uses.
Having a combination of these methods will ensure you’re prepared for any situation.
Non-Perishable Foods: Long Shelf Life, High Energy
When preparing your food supplies for a DIY emergency kit, it’s best to select non-perishable options that have a long shelf life. This ensures your food will stay safe to eat over time, even if it’s stored for months or years. Here are some great options:
- Canned Goods: Foods like beans, soup, and vegetables have a long shelf life and can be a great source of nutrition in emergencies.
- Peanut Butter: High in protein and fat, peanut butter is a great option for quick energy and can last for a long time without refrigeration.
- Granola Bars & Trail Mix: These are easy to store and provide quick, easy energy during stressful situations. They also tend to be lightweight and compact.
- Dehydrated or Freeze-Dried Foods: Foods like powdered eggs, freeze-dried fruit, and meals from companies like Mountain House can be great for long-term storage and are easy to prepare with water.
Manual Can Openers: A Must-Have Tool
Don’t forget to include a manual can opener in your kit! While canned food is excellent for emergencies, you need a way to open it. A can opener will make accessing your food supplies much easier. Be sure to pick one that is durable and lightweight, as it could become your most useful tool during a power outage or extended emergency.
Explore the water survival & purification here.
4. First Aid Supplies: Your Lifeline in an Emergency
A well-stocked first aid kit is one of the most important components of any DIY emergency preparedness kit. Whether it’s a minor injury or a more serious situation, having the right medical supplies on hand can make all the difference. Let’s break down the essential items you should include in your kit.
Bandages and Gauze: For Cuts, Scrapes, and Wounds
Injuries can happen quickly during emergencies, especially if you’re in a chaotic situation. Having bandages and gauze in your kit ensures that you can treat cuts, scrapes, or abrasions before they turn into more serious infections.
- Bandages: These are used to cover small wounds and prevent dirt and bacteria from entering. Be sure to have a mix of adhesive bandages in various sizes for minor cuts, as well as sterile gauze pads for larger wounds.
- Gauze: Gauze is essential for dressing larger wounds or to control bleeding. If a wound is deep, you may need a sterile gauze pad to apply pressure and stop the bleeding.
Having sterile dressings and bandage rolls on hand is important, as they allow you to clean and cover wounds safely, minimizing the risk of infection.
Antiseptic Wipes: For Cleaning and Preventing Infection
When you’re in an emergency situation, it’s likely that water and soap will be scarce. That’s why antiseptic wipes are essential in your first aid kit. These wipes help you clean wounds, cuts, and any other injuries before applying a bandage. They also help sanitize your hands, reducing the risk of infection.
Some important antiseptic wipes to consider include:
- Alcohol wipes: Great for cleaning small wounds and sanitizing tools or surfaces.
- Iodine wipes: A stronger disinfectant that can help cleanse larger wounds and avoid infection.
Pain Relievers and Prescription Medications: Managing Discomfort
Pain can make an already stressful situation even worse. Having pain relievers and necessary prescription medications in your first aid kit ensures you can manage minor pain and discomfort during an emergency. Here’s what you should include:
- Pain Relievers: Over-the-counter pain medications like ibuprofen and acetaminophen are essential for reducing fever, swelling, and aches.
- Prescription Medications: If anyone in your household relies on prescription medication (such as for diabetes, heart conditions, or allergies), it’s vital to have an adequate supply in your emergency kit. Be sure to include medications that are commonly used, including epinephrine auto-injectors for severe allergies.
For prescription medications, it’s a good idea to have a small storage container that keeps the meds organized and easily accessible.
Other Essential First Aid Items
In addition to bandages, antiseptic wipes, and pain relievers, here are other items you may want to include in your first aid kit:
- Thermometer: To check for fever or other signs of illness.
- Tweezers: Useful for removing splinters, ticks, or debris from wounds.
- Scissors: To cut bandages, gauze, or tape.
- Elastic Bandages: For wrapping sprains or strains.
Having these items in your kit can help you respond quickly and effectively to injuries, illnesses, or accidents.
5. Tools and Equipment: Essential Items for Emergency Situations
When you find yourself in an emergency, having the right tools and equipment can make all the difference in your survival and comfort. Below are key tools to include in your DIY emergency preparedness kit, designed to provide you with light, power, and the means to handle basic tasks.
Lighting and Power: Brighten the Way
Power outages are common during emergencies, and darkness can make an already stressful situation even worse. That’s why having reliable lighting and power sources in your kit is a must.
- Solar-Powered Flashlight: A solar-powered flashlight is an excellent choice because it doesn’t require batteries. You can leave it in the sun to charge during the day, ensuring it’s ready when you need it. Solar flashlights are great for long-term use and environmental sustainability.
- Crank Flashlight: A crank flashlight is another reliable tool. These flashlights don’t need batteries—simply wind them up to generate power. It’s perfect for emergency situations when you might not have access to electricity or batteries.
- Extra Batteries: Be sure to include extra batteries in your kit to power devices like flashlights, radios, and other essential tools.
- Power Bank: A power bank is a small, portable battery that can charge your phone or other devices. In emergencies, being able to charge your phone is critical for communication or getting information.
Multi-Use Tools: The All-in-One Lifesaver
In emergencies, having a tool that can perform several tasks is invaluable. Multi-use tools are compact, versatile, and can help you handle a variety of challenges.
- Swiss Army Knife: A Swiss Army knife is a classic multi-tool that includes a knife, screwdrivers, scissors, and more, all in one device. Whether you need to open a can, cut rope, or make minor repairs, a Swiss Army knife can be your best friend in a pinch.
- Multi-Tool: A multi-tool goes beyond just a knife, often including pliers, wire cutters, and can openers. This tool can help with everything from fixing a broken piece of equipment to building shelter or starting a fire.
Must-Have Tools for Emergencies
Below is a list of the must-have tools that should always be in your DIY emergency preparedness kit:
List 1: Must-Have Tools for Emergencies
| Tool | Purpose |
| Flashlight | Provides light during power outages or in dark areas. |
| Multi-tool | Offers a variety of tools for cutting, repairing, and opening. |
| Duct tape | Useful for repairing broken items or sealing leaks. |
| Rope/Paracord | Essential for creating shelters, securing items, or tying down gear. |
Each of these tools has multiple uses, making them indispensable in emergency situations. From duct tape, which is incredibly versatile for quick repairs, to rope or paracord for building shelters or securing items, these tools help you manage a wide range of challenges without taking up much space in your kit.
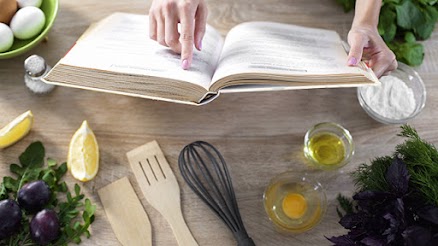
6 – Top 5 Books for Emergency Preparedness
When preparing for emergencies, having the right resources at your disposal is crucial. While assembling an emergency kit with essential items is vital, equipping yourself with knowledge through well-researched survival books can make all the difference. Below are five must-read survival books that provide invaluable guidance for various scenarios:-
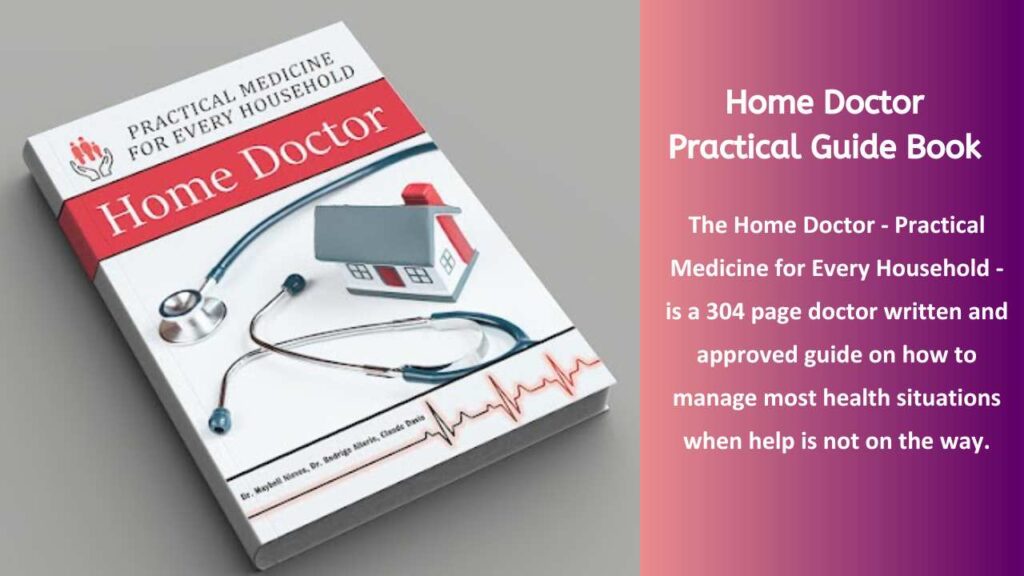
1. The Home Doctor Book
The Home Doctor is a treasure trove of medical advice tailored for households and emergency situations. This guide provides step-by-step instructions for treating common ailments like arrhythmias, wound care, and even more complex medical issues using natural remedies. Its user-friendly approach makes it accessible even for beginners, empowering individuals to manage medical emergencies when professional care is unavailable.
Additionally, the book includes bonus guides on wild edibles and Native American healing practices, offering a holistic perspective on health and survival. Its affordable pricing and 60-day money-back guarantee make it a risk-free addition to any household. Here is quick anlaysis of the book:-
- Book Title: Home Doctor Book: Practical Medicine for Every Household
- Author: Dr. Maybell Nieves, Dr. Rodrigo Alterio, Claude Davis
- Pages: 304
- Rating: 4.4/5 stars
- Format: Physical + Digital
- Key Features: Practical health tips, innovative methods, bonus digital resources, comprehensive solutions, 60-day money-back guarantee.
- Focus Areas: Self-applied protocols, emergency guidance, essential supplies, accessible language.
- Bonus Gifts: Wild Edibles Guide, Natural Healing Secrets of Native Americans (Digital Format).
- Overall: A comprehensive guide for everyday health challenges
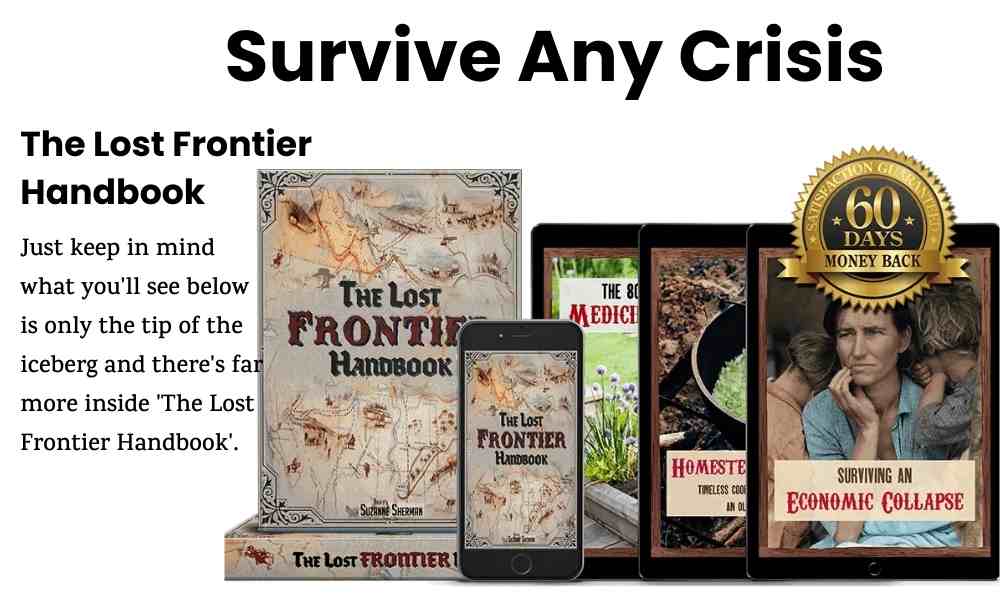
2. The Lost Frontier Handbook
For those looking to rediscover self-reliance, The Lost Frontier Handbook by Suzanne Sherman is a valuable resource. This book revives age-old survival techniques, teaching readers how to thrive with minimal resources. It covers essentials such as food preservation, water filtration, gardening, and even building a root cellar.
Designed for beginners and seasoned survivalists alike, its clear instructions and comprehensive coverage make it an excellent guide for anyone interested in sustainable living or emergency preparedness. The 60-day money-back guarantee ensures peace of mind for readers exploring these timeless survival strategies. Here is quick anlaysis of the book:-
- Title: The Lost Frontier Handbook
- Author: Suzanne Sherman
- Topics: Survival Skills, Self-Reliance, Preparedness
- Contents: Medicinal Remedies, Food Preservation, Water Sourcing, Economic Collapse Survival, Homesteading, Superfoods, Free Land Guide
- Format: Digital and Physical
- Bonuses: 80 Sq. Ft. Medicinal Garden, Surviving an Economic Collapse, Homestead Cooking 101
- Guarantee: 60-day Moneyback
- Recommendation: BuySmart-approved for a self-sufficient future.
- Overview: A user-friendly guide with clear instructions for beginners and seasoned preppers.
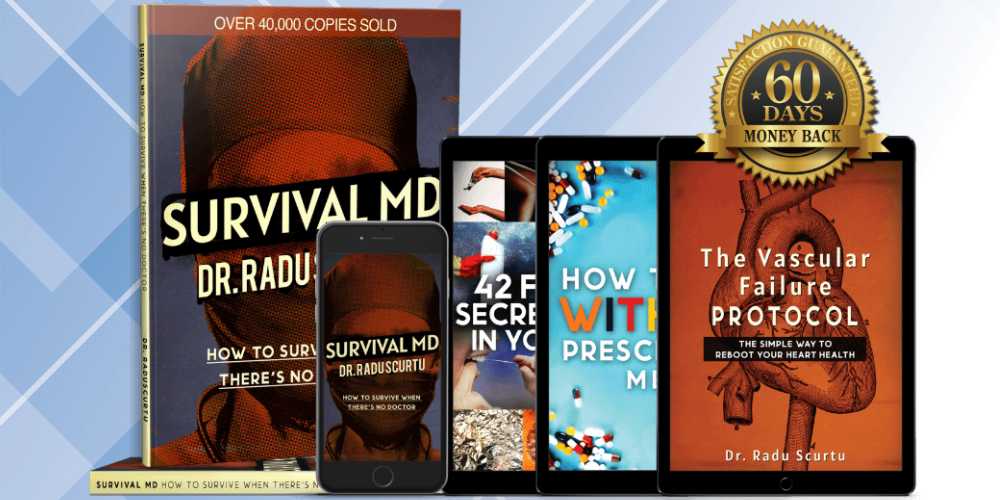
3. Survival MD Book
Medical emergencies during disasters can be daunting, but the Survival MD Book serves as a lifeline. Written by Dr. Radu Scurtu, this guide offers actionable advice for managing medical crises when healthcare access is compromised. From handling chronic conditions to treating injuries, it provides real-world solutions to pressing medical issues.
The book also includes bonus materials, such as “42 First Aid Secrets” and “The Vascular Failure Protocol,” making it a comprehensive resource. Its practical tips, combined with the expertise of a seasoned medical professional, make it an indispensable addition to any prepper’s library. Here is quick anlaysis of the book:-
- Title: Survival MD
- Format: Available in Physical & Digital formats
- Author: Dr. Radu Scurtu (with expert collaboration)
- Content: Comprehensive emergency medical guidance for chronic diseases, injuries, and crises
- Language: Easy-to-understand, accessible for all readers
- Bonuses:
- B1. 42 First Aid Secrets
- B2. The Vascular Failure Protocol
- B3. How to Live Without Prescription Meds
- Price: Discounted to $37 (76% off original price of $151)
- Rating: 4.6/5 stars
- Availability: Both physical and digital formats
- Guarantee: 60 day Money Back
- Recommendation: Highly recommended for preppers, families, and those seeking medical preparedness in emergencies.
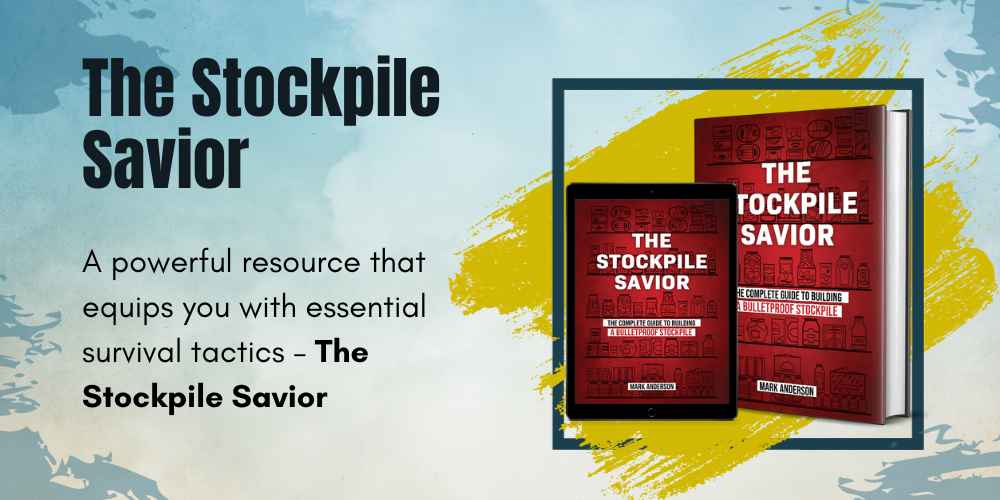
4. The Stockpile Savior Book
Building a survival stockpile can feel overwhelming, but The Stockpile Savior Book simplifies the process with a 10-day plan. This guide walks readers through creating a reliable stockpile of essential food, water, and security measures, ensuring preparedness for the first 100 days of any disaster.
In addition to the main guide, readers gain access to three special reports that delve into advanced survival tactics, such as staying safe during civil unrest and efficiently managing stockpiles during crises. Whether you’re new to prepping or an experienced survivalist, this book provides actionable insights that are both practical and effective. Here is quick anlaysis of the book:-
- Title: The Stockpile Savior
- Author: Mark Anderson (The Stockpile Scientist)
- Format: Physical + Digital
- Length: 150+ pages
- Topics Covered: Civil unrest survival, prepping for emergencies, food & water storage, security strategies
- Target Audience: Preppers, survivalists, concerned citizens
- Bonus Materials: 3 Special Reports on hidden stockpiling, rights protection, and riot survival tactics
- Price: $39
- Guarantee: 60-day money-back guarantee
5. Water Freedom System Book
Access to clean water is paramount in any survival situation, and the Water Freedom System Book offers an innovative solution. This guide details a solar-powered water collection method using condensation technology to extract water from the air. Ideal for regions with high humidity, this system is eco-friendly, cost-effective, and easy to maintain.
While its efficiency depends on environmental factors, it provides a sustainable option for tackling water scarcity. Whether for emergency use or as a long-term solution, this book equips readers with the knowledge to secure a vital resource in challenging times.
Each of these books serves as a valuable resource for building resilience and ensuring preparedness for emergencies. By incorporating these comprehensive guides into your survival strategy, you can confidently face unexpected challenges with knowledge and skill. These books, reviewed on BuySmart Advisor, are perfect companions for anyone serious about survival and self-sufficiency.
Here is quick anlaysis of the book:-
- Water Source: Atmospheric water condensation
- Power Source: Solar-powered
- Water Output: Up to several liters per day (depending on climate conditions)
- Filtration: Built-in purification system for clean, drinkable water
- Installation: Easy to set up with minimal technical knowledge required
- Maintenance: Low maintenance, requires minimal upkeep
- Portability: Compact and easy to move around
- Climate Suitability: Best suited for humid environments
- Warranty: 60-day money-back guarantee
- Bonus: Access to a user manual, support community, water conservation guide, and exclusive webinars
Comparison Table for Books
Here’s a comparison table for the Top 5 Survival Books to help readers quickly assess their key features and benefits:
| Book | Focus | Best For | Key Feature | Guarantee |
| Home Doctor Book | Emergency medical care | Families and individuals | Practical remedies & natural solutions | 60 days |
| Lost Frontier Handbook | Self-reliance skills | Preppers and homesteaders | Food preservation and water filtration | 60 days |
| Survival MD Book | Medical emergencies | Medical preppers | Actionable advice for healthcare gaps | 60 days |
| Stockpile Savior Book | Emergency stockpiling | New and seasoned preppers | 10-day plan to build a survival stockpile | 60 days |
| Water Freedom System | Water sustainability | Water-scarce areas | Solar-powered water extraction system | 60 days |
7. How to Save Money While Building Your Kit
Building an emergency preparedness kit doesn’t have to break the bank. There are plenty of ways to save money without sacrificing the quality or reliability of the items you include. Here are some practical tips that will help you build a solid DIY emergency preparedness kit on a budget.
Shop at Dollar Stores for Basic Items
Dollar stores are a great place to find basic emergency supplies at a fraction of the cost. You can pick up essential items like:
- Flashlights and batteries
- First aid supplies, such as bandages and antiseptic wipes
- Non-perishable snacks like crackers and granola bars
Many dollar stores carry items that meet emergency preparedness needs, so you can save a lot without compromising on quality. Don’t forget to check the expiration dates for food and medical supplies to ensure they’re still good for long-term storage.
Use Coupons and Look for Sales on Non-Perishables
Purchasing non-perishable foods like canned goods, dry beans, and rice can quickly add up, but using coupons and shopping sales can significantly lower the cost. Many grocery stores and online retailers offer:
- Coupons for canned foods, granola bars, and other shelf-stable items
- Discounted sales on bulk purchases, especially when buying in larger quantities
- Clearance items for overstocked emergency items that are nearing their best-before date but still have long shelf lives
Make sure to subscribe to grocery store newsletters or download coupon apps to find deals on your favorite emergency supplies.
Check Thrift Stores for Items Like Backpacks and Blankets
Thrift stores are a hidden gem when it comes to affordable emergency supplies. Here’s what you can typically find:
- Backpacks for your emergency kit, which can be found for a fraction of the price compared to new ones.
- Blankets or sleeping bags that are gently used but still in great condition, perfect for including in your kit.
- Clothing and hats to keep warm or to use as extra layers during emergencies.
When shopping at thrift stores, make sure to inspect the items carefully for any damage or excessive wear. If you find anything that’s still in good condition, you can save a significant amount.
BuySmart – Trusted Guides, Books, and Tools
Another great way to save money while ensuring you get reliable resources is by exploring trusted websites like BuySmart. This platform offers an extensive collection of emergency survival guides, books, tools, and equipment tailored to emergency preparedness. BuySmart’s products are handpicked to meet your survival needs, and they offer money-back guarantees on many items.
Whether you’re looking for survival manuals, practical tools, or expert kits, BuySmart offers affordable options to help you build your kit wisely. With their money-back guarantee, you can buy with confidence, knowing you’re making a smart investment for your emergency preparedness.

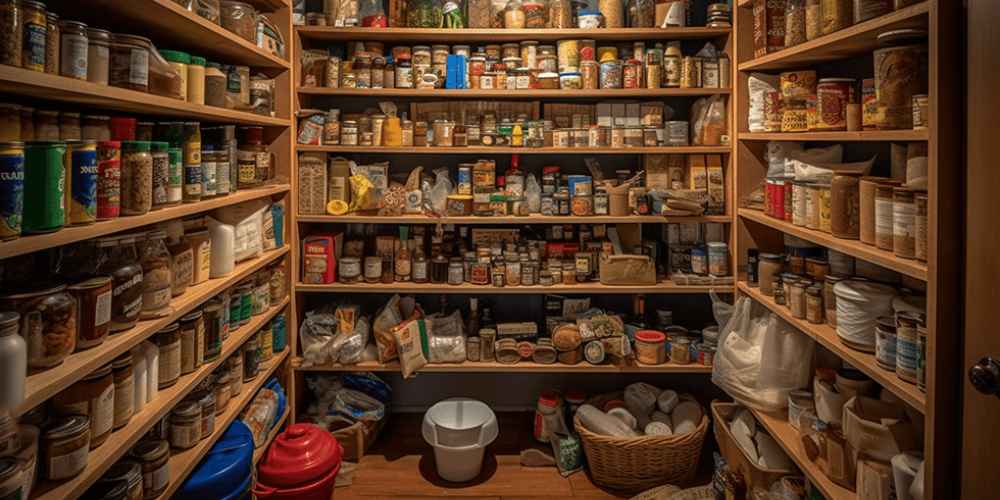
8. Long-Term Storage Tips for Your Emergency Preparedness Kit
Once you’ve assembled your DIY emergency preparedness kit, the next step is ensuring its items remain in good condition for long-term use. Proper storage plays a critical role in preserving the freshness and functionality of your supplies. Here are some practical tips to keep your emergency kit ready for action, no matter when disaster strikes.
1. Store Your Kit in a Cool, Dry Place
Temperature and humidity can drastically affect the longevity of your emergency supplies. Extreme heat or moisture can cause food to spoil, medications to lose effectiveness, and even damage tools and electronics. To ensure your kit stays in top condition, store it in a cool, dry place that meets the following criteria:
- Temperature Range: Ideally, your kit should be stored at a temperature between 50°F (10°C) and 70°F (21°C). This prevents food from spoiling and keeps your supplies in working order.
- Avoid Humidity: Moisture can lead to mold growth and rusting of metal tools. Avoid storing your kit in areas like basements or attics where humidity levels fluctuate.
- Easy Access: Make sure the storage location is easily accessible but also safe from potential risks like flooding or fire. Consider areas like a closet or a basement room with controlled temperature.
Explore complete details of Emergency Food Storage.
2. Use Airtight Containers for Protection
Airtight containers are essential for protecting your emergency supplies from pests, moisture, and air exposure. Whether it’s food, medications, or tools, airtight storage helps preserve the integrity of your items over time. Here’s why you should use them:
- Preventing Pests: Containers with sealed lids protect your food from rodents, insects, and other pests. This is especially important for food like dried fruits, nuts, and grains that may attract pests if left unsealed.
- Moisture Control: Airtight containers prevent moisture from getting in, keeping your supplies dry and safe. For example, dehydrated foods or electronics will last longer when shielded from moisture.
- Longer Shelf Life: Many emergency food products come with long shelf lives, but to get the most out of them, store them in airtight containers to avoid exposure to air, which can shorten their shelf life.
3. Rotate Your Supplies Regularly
To make sure your emergency supplies are always fresh and usable, it’s important to rotate them regularly. Here’s how to do it:
- Use the First-In, First-Out (FIFO) Method: When you add new items to your kit, place older items in the front so you use them first. This ensures you always have fresh supplies when you need them.
- Check Expiration Dates: Food, medications, and other perishable items in your kit have expiration dates. Make it a habit to check these dates every 6 months to 1 year and replace any expired items.
- Replace Batteries: Batteries lose charge over time, so make sure to replace them periodically, even if they’re not used.
4. Label Containers and Items Clearly
Clear labeling will help you easily identify your supplies and track expiration dates. Here are some tips:
- Label food and medications with their expiration dates so you know when to replace them.
- Mark containers with clear instructions for use, especially for tools or survival gear.
- Store a master list of your kit’s contents in a visible location, so you can quickly assess if anything is missing or needs replacing.
5. Keep the Kit in a Secure, Easy-to-Grab Location
When storing your DIY emergency preparedness kit, it’s essential to keep it somewhere safe but also easy to grab in case of an emergency. In the event of a disaster, every second counts. Here’s how to ensure quick access:
- Keep the kit in a designated spot that everyone in the household knows about.
- Consider a portable container or backpack for easy transport.
- Store it in an area that is secure from accidents or theft but still quick to access when needed.

Conclusion
Building a DIY emergency preparedness kit is an essential step in ensuring your family’s safety during unpredictable situations. By focusing on key essentials like food, water, first aid supplies, and tools, you can create a reliable kit that meets your specific needs. The benefits of building your own kit are clear—cost savings, customization, and hands-on awareness of your supplies. Additionally, by storing your kit in a cool, dry place and using airtight containers, you can protect your items from damage, ensuring they are ready when you need them most.
Remember, preparing your kit doesn’t have to break the bank. With the right resources, including discount stores, and rotating your supplies regularly, you can keep your kit fresh and functional without overspending. Being proactive today means peace of mind tomorrow—your emergency preparedness kit is a smart investment in your family’s well-being. Stay safe, stay prepared!
FAQs (Frequently Asked Ques)
1. What are 10 items you need for an emergency kit?
Creating an emergency kit is crucial for ensuring your safety during unexpected situations. Here are 10 essential items to include:
- Water: At least one gallon per person per day for drinking and sanitation.
- Non-perishable food: Canned goods, energy bars, and dried fruits.
- First aid kit: Bandages, gauze, antiseptic wipes, and necessary medications.
- Flashlight: Preferably solar-powered or crank-operated to save on batteries.
- Batteries: Ensure you have spare batteries for all your devices.
- Multi-tool: A Swiss Army knife or other versatile tools for repairs and survival.
- Portable phone charger: To keep your phone powered during an emergency.
- Clothing: Extra clothes, including weather-appropriate items and sturdy shoes.
- Firestarter: Matches, a lighter, or a fire steel to build a fire for warmth and cooking.
- Blankets or sleeping bags: To stay warm in case of power outages or cold conditions.
These items form the foundation of a well-rounded emergency kit for home, travel, or evacuation.
2. How to make a DIY emergency kit?
To make a DIY emergency kit, follow these steps:
- Assess Your Needs: Consider your location, climate, and specific family needs (like medical conditions).
- Start with the Basics: Include essential items like water, food, first aid supplies, and tools.
- Customize for Your Family: Add medications, baby supplies, pet needs, or special items based on family members’ requirements.
- Use a Sturdy Container: Pack everything in a durable bag or plastic container.
- Keep It Updated: Regularly check and update the kit, replacing expired food, medicine, or other items.
A DIY emergency kit is budget-friendly, customizable, and gives you a sense of control over your emergency preparedness.
3. What goes in an emergency kit checklist?
An emergency kit checklist includes the following:
- Water (1 gallon per person per day)
- Non-perishable food items (canned goods, energy bars)
- First aid supplies (bandages, antiseptics, pain relievers)
- Flashlight and batteries
- Multi-tool or knife
- Whistle
- Portable charger and spare batteries
- Extra clothes, shoes, and blankets
- Personal hygiene items (soap, wet wipes, toothbrush)
- Important documents (ID, medical records)
- Fire-starting equipment (matches, lighter)
- Cash: Small bills and coins in case ATMs are down.
Ensure your checklist covers all basics and customize it for your unique needs.
4. What would you pack in an emergency kit?
When packing an emergency kit, include:
- Water (one gallon per person per day for drinking and sanitation)
- Food (non-perishable items like canned beans, peanut butter, energy bars)
- First aid items (bandages, antiseptic wipes, painkillers)
- Personal hygiene items (toothbrush, soap, sanitary supplies)
- Tools (flashlight, multi-tool, duct tape)
- Communication devices (radio, phone charger)
- Fire-starting items (matches, lighters, fire starters)
- Warm clothing and blankets
- Important documents (ID, insurance papers)
- Cash for emergency expenses
Always check that the items are in good condition and replace anything that’s expired.
5. What to put in a girls emergency kit?
A girls emergency kit should include all the essentials, plus some items for personal care:
- Water and non-perishable snacks
- First aid supplies (bandages, antiseptic, pain relievers)
- Personal hygiene items (feminine products, wipes, hand sanitizer)
- Comfort items (blankets, books, or small toys for children)
- Portable phone charger
- Clothing (extra set, including warm clothes or socks)
- Flashlight and spare batteries
- Important documents
- Medications, including birth control or any prescriptions
- Cash for emergencies
These items ensure you’re ready for a variety of situations, from minor to major emergencies.
6. What is the 3 days emergency supply?
The 3 days emergency supply typically includes enough food, water, and basic items to sustain you for 72 hours. This usually covers:
- Water: At least 1 gallon per person per day.
- Food: Non-perishable items like granola bars, canned goods, and dried fruits.
- First aid: Basic medical supplies, including pain relievers, bandages, and antiseptics.
- Shelter: A tent, tarp, or emergency blanket to stay warm.
- Tools: Flashlight, multi-tool, and batteries.
- Hygiene items: Wet wipes, hand sanitizer, and toilet paper.
This supply allows you to stay self-sufficient while waiting for help during emergencies.
7. What is DIY emergency?
DIY emergency refers to creating your own emergency preparedness kit or safety measures rather than relying on pre-packaged kits. It involves:
- Assessing your family’s needs and creating a customized kit.
- Selecting items based on budget and the specific environment you live in.
- Learning survival skills and using affordable tools for emergency situations.
DIY emergency preparedness allows you to take control of your safety while keeping costs low.
8. How to make your own survival food kit?
To make your own survival food kit, follow these steps:
- Choose Non-Perishable Foods: Look for freeze-dried meals, canned goods, energy bars, and dehydrated fruits.
- Include Variety: Ensure the kit contains a balance of protein, carbohydrates, and fats.
- Pack a Manual Can Opener: Don’t forget tools for accessing your food.
- Store in Airtight Containers: Protect your food from moisture and pests.
- Rotate Stock Regularly: Check expiration dates and replace expired items.
This will ensure your survival food kit remains fresh and ready when you need it.
9. What is in a basic emergency kit?
A basic emergency kit includes:
- Water: 1 gallon per person per day.
- Non-perishable food: Granola bars, canned goods, and dry fruits.
- First aid supplies: Band-aids, antiseptics, pain relievers.
- Flashlight: Solar or crank-operated flashlight.
- Multi-tool: A Swiss Army knife or similar tool.
- Portable charger: To keep your phone powered.
- Personal hygiene items: Wet wipes, soap, and a toothbrush.
These basic supplies are the starting point for any emergency kit.
10. What are 7 perfect foods for survival?
Here are 7 perfect foods for survival:
- Rice: Long shelf life and easy to prepare.
- Canned beans: A great protein source and non-perishable.
- Peanut butter: High in protein and lasts a long time.
- Canned fruits and vegetables: Rich in vitamins and nutrients.
- Granola bars: Convenient and nutrient-dense.
- Instant oatmeal: Easy to cook and stores well.
- Beef jerky: High in protein and lasts for a long time.
These foods are nutrient-packed, easy to store, and provide essential energy during emergencies.
11. Why are clothes important in an emergency kit?
Clothes are essential in an emergency kit because they provide warmth, protection, and comfort. You should include:
- Weather-appropriate clothing: Layers for warmth in cold weather or breathable fabrics in hot weather.
- Sturdy shoes: For walking or evacuating if necessary.
- Extra socks and underwear: To stay clean and comfortable.
Having extra clothes helps maintain body temperature and protect you from the elements during an emergency.
12. What documents are needed for emergency checklist?
For an emergency checklist, include the following important documents:
- Identification (driver’s license, passport)
- Medical records (prescriptions, vaccination history)
- Insurance information (health, home, auto)
- Emergency contacts (family, doctors, friends)
- Financial documents (bank account, credit card info)
- Legal documents (wills, power of attorney)
Keep these in a waterproof bag to ensure they remain safe and accessible during emergencies.
13. What is the ABCD emergency checklist?
The ABCD emergency checklist is a simple way to prioritize actions during an emergency:
- A: Assess the situation and ensure safety.
- B: Balance resources like food, water, and medical supplies.
- C: Communicate with family members, emergency responders, or neighbors.
- D: Document important information (insurance, contacts, etc.).
This method helps you stay organized and prepared during stressful situations.
14. What are the five basic emergency procedures?
The five basic emergency procedures include:
- Assess the situation: Determine if it’s safe to act.
- Call for help: Alert authorities or emergency services.
- Provide first aid: Help the injured with basic care.
- Evacuate: Move to a safer area if necessary.
- Stay calm: Remain composed to make better decisions during the emergency.
These procedures guide you through critical moments, ensuring you take the right actions.
15. What should I check first in an emergency?
The first thing to check in an emergency is safety. Ensure:
- Your surroundings are safe: Check for immediate hazards like fire, gas leaks, or structural damage.
- Everyone is accounted for: Make sure all family members are safe.
- Emergency services are notified: Call 911 if needed.
Once safety is established, proceed with other necessary actions like medical aid or evacuation.
External Links and Resources
Sources
- FEMA.gov
- RedCross.org
- CDC.gov


[…] planning now. Build an emergency kit with essential items like food, water, first aid supplies, and flashlights. Discuss evacuation […]
[…] Survival gear is made up of various tools designed to help you in critical situations. These items are necessary for staying alive and safe, especially when you find yourself in an emergency. Let’s break down what makes survival gear truly essential. […]
[…] Survival Kit: A basic survival kit with matches, fire starters, and first aid can improve your chances in an emergency. […]
[…] this guide, we’ll walk you through how to build the perfect emergency kit tailored for city living. From essential items to smart strategies, we’ll help you stay one step […]