Introduction
Emergency Shelter Building is a skill that can make the difference between survival and danger in a crisis. Imagine you’re stranded after a sudden natural disaster—floods, wildfires, or a storm. The weather is harsh, and you need a safe space fast. In situations like these, knowing how to quickly create a shelter can protect you from the elements and help you stay safe.
This article will guide you through the essential steps of building your own emergency shelter, regardless of your environment or available resources. Whether you’re a seasoned survivalist or just starting to learn, you’ll gain valuable insights on how to create a secure, temporary refuge that could save your life in a disaster.
Let’s dive into the crucial steps for emergency shelter building and help you feel more confident in any emergency situation.
Key Takeaways
- Emergency shelter building is a vital survival skill that can save your life in extreme situations.
- Understanding your environment, including weather and terrain, is crucial for selecting the right shelter design.
- Natural materials like branches and leaves can be used effectively for construction.
- Always prioritize safety by choosing a secure, risk-free location.
- Proper insulation is key to keeping your shelter comfortable and safe.
- Common mistakes include choosing the wrong location or neglecting insulation—avoid them by assessing risks and using enough materials.
- Practice these skills regularly to be prepared for any emergency.
What is Emergency Shelter Building?
Emergency Shelter Building refers to the process of constructing a temporary refuge in a crisis situation. It’s about quickly creating a safe space to protect yourself from harsh weather, extreme temperatures, or dangerous surroundings.
In emergencies like natural disasters, you often need to act fast, and building a shelter can be your first step toward survival. Having a shelter can shield you from the elements, keep you warm, and help prevent injuries.
Whether it’s a hurricane, earthquake, or even a sudden snowstorm, knowing how to build a shelter is crucial. These situations demand quick thinking and resourcefulness to ensure your safety. Emergency shelter building can make all the difference in protecting yourself and your loved ones when every second counts.
Why Knowing How to Build an Emergency Shelter is Crucial
In emergencies like hurricanes, wildfires, or earthquakes, the need for quick shelter is immediate. Take, for example, a hurricane. As the storm approaches, high winds and heavy rain can cause destruction, and without shelter, exposure to the elements could lead to serious harm.
In wildfires, the air is filled with smoke, and the ground can catch fire in moments. Emergency shelter building in such scenarios isn’t just a comfort—it’s a matter of survival. Knowing how to build a shelter in these situations can be the key to staying safe.
It provides protection from the environment, keeping you warm, dry, and safe from potential hazards like falling debris or freezing temperatures. Being prepared with survival skills, such as emergency shelter building, can help you handle these high-stress situations with confidence. It’s not about luck—it’s about having the knowledge to act when every minute counts.
Key Principles of Shelter Building
Understanding Your Environment
Before you start building your emergency shelter, it’s vital to understand the environment you’re in. The climate, terrain, and weather play a huge role in the design and materials you choose for your shelter. For example, in a hot, sunny environment, shade is crucial, so your shelter should reflect sunlight and allow airflow. In colder climates, you need a structure that can retain heat and block the wind.
Consider the following factors:
- Climate: Whether you’re facing extreme heat, cold, or moisture, you need a shelter that can handle these conditions.
- Terrain: The ground you’re building on will affect the shelter’s stability. Look for level ground that’s free from hazards like falling rocks.
- Weather: Immediate weather conditions will also impact your choice of shelter, especially if heavy rain or snow is expected.
Materials You’ll Need
When it comes to emergency shelter building, materials are key. You can use natural materials like branches, leaves, and rocks to create a shelter. These items are often readily available and can provide basic protection. For example:
- Branches: Perfect for building the framework of your shelter.
- Leaves: Great for insulation and covering your shelter to trap heat.
- Rocks: Useful for creating a sturdy foundation.
Man-made materials, such as tarps and tents, are also beneficial. If you have access to them, these materials can make your shelter even more secure and comfortable. Tarps, for instance, are lightweight and waterproof, which is especially helpful in rainy conditions.
The Shelter’s Structure
The design of your shelter depends on the environment and available materials. There are several types of structures to choose from:
- Lean-To: A simple structure built with branches leaning against a strong support, offering a quick and effective way to shield yourself from wind and rain.
- A-Frame: A more solid structure, ideal for snowy or cold environments as it sheds water and snow easily.
- Snow Trench: In extremely cold environments, digging a trench in the snow provides insulation and protection from the wind.
Each design has its advantages depending on the situation, but the goal is always the same—creating a space that keeps you safe and sheltered.
Table: Types of Shelter Designs and Their Benefits
| Shelter Type | Best for | Benefits | Drawbacks |
| Lean-To | Mild to moderate weather, light rain | Simple and quick to build, good for wind break | Doesn’t provide much insulation in cold weather |
| A-Frame | Cold and snowy environments | Great for snow shedding, strong and durable | Requires more time and effort to build |
| Snow Trench | Extreme cold, snowy climates | Excellent insulation from cold and wind | Can be hard to dig, requires deep snow |
| Tarp Shelter | All weather conditions (with proper setup) | Waterproof, portable, and easy to set up | Limited insulation, may not protect from heavy winds |
Step-by-Step Guide to Building Shelter
Finding the Perfect Location
Location is crucial in emergency shelter building. The first step is to find a safe area that’s free from hazards like flooding, falling trees, or rocks. Look for:
- Flat, dry ground to prevent moisture from seeping into your shelter.
- Protection from the wind by positioning your shelter near natural windbreaks like hills or dense trees.
- Distance from danger zones, such as fire-prone areas in a wildfire or landslide-prone regions in earthquakes.
The right location will make your shelter more stable and comfortable.
Building the Shelter
Once you’ve found the perfect spot, it’s time to start building. Here’s a simple step-by-step guide to building a basic shelter:
- Create a Foundation: Gather large, sturdy branches or logs and lay them on the ground to create the base.
- Frame the Structure: Lean smaller branches against a large support to form the shelter frame.
- Cover the Frame: Use leaves, branches, or a tarp to cover the frame and create walls.
- Insulate the Shelter: Add more layers of leaves, grass, or any available material to trap heat and insulate the shelter.
Insulating Your Shelter for Maximum Comfort
Insulation is key to ensuring your shelter remains warm and dry. If you’re in a cold environment, you’ll want to use thick layers of leaves, moss, or even snow. In warmer conditions, ensure airflow through the shelter to avoid overheating.
Use materials like:
- Leaves: Insulate the roof and walls to trap heat.
- Grasses and moss: These can fill gaps to keep the shelter warm.
- Clothing: In a pinch, your own clothes or blankets can serve as extra insulation.
Emergency Shelter Building: Tools and Equipment You Should Have
Basic Tools for Shelter Building
Although it’s possible to build a shelter with natural materials, certain tools make the job much easier. Here are some essentials:
- Knife: Useful for cutting branches and shaping materials.
- Rope: Helps secure materials in place.
- Axe: Ideal for chopping larger pieces of wood or cutting down trees.
Tools and Materials to Enhance Shelter
While basic tools are necessary, certain items can make your shelter more durable and comfortable:
- Tarps: Lightweight, waterproof, and easy to carry, tarps can offer extra protection in rain or wind.
- Tents: If available, tents are designed for quick shelter and can be easily set up.
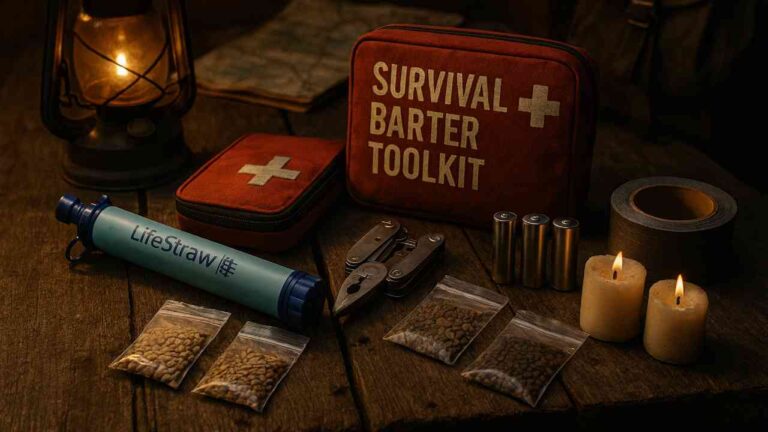
- Survival Kit: A basic survival kit with matches, fire starters, and first aid can improve your chances in an emergency.
By having the right tools and materials, you’ll be able to build a more efficient and comfortable shelter, giving you a better chance of surviving in a crisis.
Explore more details about emergency preparedness.
Table: Materials for Building an Emergency Shelter
| Material | Source | Use | Best for |
| Branches | Found in forests, fields | Frame structure, roof support | Building the shelter’s framework |
| Leaves | Trees, bushes | Insulation, covering roof and walls | Warmth insulation and waterproofing |
| Rocks | Available in most environments | Foundation, support for structure | Stability, preventing shelter collapse |
| Tarps | Pre-packaged, carry in emergency kits | Weather protection, waterproof covering | Fast, portable shelters in all weather |
| Rope | Carry in survival kit | Tying materials together, securing shelter | Holding the shelter structure |
Shelter Building in Extreme Weather Conditions
Emergency shelters need to be versatile to handle different weather challenges. Whether it’s scorching heat, freezing temperatures, or relentless rain, knowing how to adapt your shelter to extreme weather can save your life. Let’s explore how you can build a shelter for extreme conditions.

Dealing with Extreme Heat
When building an emergency shelter in extreme heat, creating shade and promoting airflow are your top priorities. Start by positioning your shelter in a shaded area, such as under large trees or rock overhangs, to block the sun. If no natural shade is available, use materials like tarps or large branches to form a canopy.
Additionally, ensure proper ventilation by leaving gaps or openings to allow air to circulate and cool the interior. Consider digging into the ground slightly, as the earth below is often cooler, which can help regulate temperature.
Surviving in Cold and Snow
When temperatures drop below freezing, your shelter’s ability to trap heat is critical. Begin by insulating the floor with leaves, grass, or pine boughs to prevent heat loss from the ground. Build walls with layers of branches and leaves to create an effective barrier against wind. For snow, make a trench or a snow cave that provides insulation from the cold. Inside the shelter, add extra layers of materials to trap your body heat. Be mindful of wind direction and position the shelter away from it to minimize cold exposure.
Building Shelters for Rainy Conditions
Rain can make a shelter wet and uncomfortable, but waterproofing your structure is essential. Start by building a roof with a slope to help rain run off. Use large tarps, leaves, or plastic sheeting to cover the shelter, ensuring the materials overlap to prevent water from seeping in. Secure the edges with rocks or stakes to prevent them from lifting in the wind. If possible, raise the shelter off the ground to avoid water seepage. A dry shelter will keep you warm and safe.
Table: Key Factors for Different Weather Conditions
| Weather Condition | Key Shelter Building Technique | Materials to Use | Tips for Success |
| Extreme Heat | Create shade and promote airflow | Tarps, branches, large leaves | Position shelter in shaded areas, ensure airflow |
| Cold & Snow | Insulate the shelter and create a wind barrier | Pine boughs, grass, leaves, snow | Insulate the ground and walls, use snow for insulation |
| Rainy Conditions | Waterproof the shelter and elevate it off the ground | Tarps, plastic sheeting, large leaves | Make sure the shelter has a sloped roof, secure edges with rocks |
🤔 Common Mistakes – How to Avoid Them
Building a shelter is a crucial survival skill, but there are common mistakes that can jeopardize your safety. Let’s go over these mistakes and how to avoid them to ensure you’re prepared for any emergency situation.
Choosing the Wrong Location
Choosing the wrong location is a critical mistake in emergency shelter building. Always avoid low-lying areas where water can collect and cause flooding. Additionally, be aware of wind exposure, especially in open fields or on mountaintops. Seek areas protected by natural barriers like hills, large rocks, or trees. Avoid building near animal tracks or under dead trees that may fall in a storm. By assessing these risk factors, you can ensure a safer shelter that will protect you.
Not Using Enough Insulation
Insulation is key to making sure your shelter retains body heat, especially in cold conditions. One common mistake is failing to use enough insulation, leading to hypothermia or discomfort. Always insulate the floor, walls, and roof of your shelter. Use materials like leaves, pine needles, or dry grass to create layers. The more layers you use, the better insulated your shelter will be. Don’t neglect this step, as insufficient insulation can compromise your safety.
Ignoring Safety Hazards
Ignoring safety hazards is a mistake that can put you in danger. For instance, building too close to a cliff or along a riverbank can result in falling rocks or flooding. Pay attention to your surroundings and look out for hazards like unstable trees, animals, or sharp rocks. Ensure your shelter is away from potential dangers, and avoid using materials that might pose fire or stability risks. Always prioritize your safety when choosing a location and building your shelter.

How to Improve Your Shelter Once You’ve Built It
Once your shelter is up and running, there are several ways to enhance its comfort and durability. Here are some tips on how to improve your shelter for a more secure and livable space.
Adding Extra Layers or Materials for Comfort
After building your basic shelter, consider adding more materials for comfort. Use extra leaves, grass, or blankets to add warmth and cushioning to your shelter’s floor. This will make sleeping more comfortable and insulate the shelter further. If you have access to additional materials like tarps, you can use them to improve the roof or walls. The more you add, the more protection and comfort you’ll have.
Creating a Fire Pit or Cooking Space
A fire pit can significantly improve your shelter by providing warmth and a means to cook food. Dig a small, safe fire pit away from your shelter, and gather dry wood to keep the fire going. A well-constructed fire pit can help you stay warm, purify water, and cook food. Ensure the fire is contained and monitored to prevent accidents.
Emergency Shelter Building: Expert Tips and Tricks
Having expert tips and tricks can take your emergency shelter building skills to the next level. Here are some pro tips to improve your shelter and ensure it’s safe, comfortable, and durable.
Building a Shelter for Multiple People
When building a shelter for multiple people, you’ll need to consider the space required for everyone to stay comfortable. Start by building a larger framework using sturdy branches or logs. If using a tarp, opt for a larger one and secure it with ropes. Create a shared sleeping area with extra insulation and make sure there’s enough airflow to avoid overheating. Keep in mind that group shelters may require more materials and a larger footprint.
Making Your Shelter Comfortable in the Long Term
To make your shelter livable for extended periods, prioritize comfort and warmth. Regularly replenish insulation and cover the shelter with materials to block the elements. If possible, set up a system for water collection, like digging a trench to collect rainwater. Consider adding ventilation or a chimney if you plan to use fire frequently. The more you care for your shelter, the longer it will remain safe and comfortable.
Using Advanced Techniques for Improved Shelter
Advanced shelter-building techniques can make your structure more robust and durable. For example, instead of relying solely on branches, use rope to tie materials together for a more secure shelter. Try weaving branches to create a stronger roof. If you’re in an area with many trees, build an A-frame shelter, which offers better protection from snow or rain. These advanced methods can enhance the durability of your shelter and keep you safer in extreme conditions.
Conclusion
In this article, we’ve covered the essential aspects of emergency shelter building, from understanding the key principles to the step-by-step guide for constructing a safe haven in any situation. Whether you’re dealing with extreme weather, finding the right location, or using natural materials, knowing how to build an emergency shelter can make a life-saving difference.
We’ve also highlighted common mistakes, such as improper insulation or poor location choices, and provided expert tips to help you improve your shelter. Being prepared is crucial—whether you’re preparing for a natural disaster or a sudden survival situation, the skills learned here can be invaluable.
Now, it’s time to practice. The more you familiarize yourself with emergency shelter building, the more confident you’ll be in facing unexpected challenges. Don’t wait for an emergency to strike—start building your knowledge and skills today!
FAQs (Frequently Asked Ques)
A shelter-in-place emergency occurs when individuals are asked to remain indoors and stay in a safe location during a hazardous event, such as a chemical spill, severe weather, or civil unrest. The idea is to limit exposure to potential dangers outside by staying in a secure environment.
The best materials for building an emergency shelter depend on what’s available, but natural materials like branches, leaves, and grass are often used for quick shelters. Tarps, tents, and plastic sheeting are also highly effective for waterproofing and insulation.
Building an emergency shelter requires basic survival skills, including the ability to assess the environment, gather materials, and construct a simple structure. Skills such as knot tying, understanding insulation techniques, and recognizing potential hazards are also essential to ensure your shelter is safe and effective.
The primary function of an emergency shelter is to protect you from the elements—whether it’s extreme heat, cold, rain, or snow. It serves as a temporary refuge that keeps you safe, dry, and warm until help arrives or conditions improve. It also provides a sense of security and a place to rest.
An emergency shelter should be quick to build, weather-resistant, and able to provide protection from the environment. It must be sturdy enough to withstand wind and other elements, provide insulation for warmth, and offer space for comfort in tight conditions.
To build an emergency shelter:
1. Choose a safe location away from hazards.
2. Gather natural materials (branches, leaves, rocks) or use man-made items like tarps.
3. Build the shelter’s structure (lean-to, A-frame, etc.).
4. Insulate the shelter using leaves or snow for warmth.
5. Ensure the shelter is waterproof by covering with tarps or plastic sheets.
Sources
- FEMA – Shelter in Place
- Survivalist – How to Build a Shelter in the Wilderness
- Red Cross – Emergency Shelter Guidelines
- National Geographic – Building an Emergency Shelter
- Survival Blog – Best Materials for Emergency Shelters
- Mayo Clinic – Shelter from the Elements in Survival Situations
- Wilderness Survival Skills – Shelter Building for Survival