
Did You Know?
Survival Water Purification Methods: Water scarcity is a pressing global issue, with nearly 785 million people worldwide lacking access to clean drinking water. This alarming figure underscores the importance of water purification, especially in survival scenarios where access to safe water can mean the difference between life and death.
In emergencies or wilderness adventures, clean water isn’t just a convenience—it’s a necessity. Contaminated water can carry harmful bacteria, viruses, and parasites, leading to severe illnesses like cholera, dysentery, and giardiasis. According to the World Health Organization (WHO), waterborne diseases cause approximately 485,000 deaths annually, emphasizing the critical need for effective purification methods.
Survivalists and outdoor enthusiasts know that even seemingly clear water from rivers or lakes may be teeming with invisible contaminants. In fact, studies show that over 90% of natural water sources can harbor harmful microorganisms. These threats make it vital to understand and implement reliable purification techniques to ensure safe hydration in any condition.
This guide will walk you through proven water purification methods that are not only easy to follow but also practical for off-grid living or emergency situations. By the time you finish reading, you’ll be equipped with the skills and knowledge needed to turn almost any water source into safe, drinkable water. Let’s dive in and empower you with this life-saving expertise!
💡 Key Takeaways
- Clean water is essential for survival; drinking contaminated water can lead to severe illnesses or death.
- Boiling water remains the most reliable and accessible purification method in emergencies.
- Portable water filters and purification tablets are lifesavers for outdoor enthusiasts and survivalists.
- Rainwater collection is one of the safest natural sources when properly stored.
- DIY methods like solar stills and sand-charcoal filters are cost-effective for purifying water.
- Flowing water from streams is safer than stagnant water, but always purify before drinking.
- Combine multiple purification methods for maximum safety when dealing with unknown water sources.
- Innovative tools like the Water Freedom System and Air Fountain offer sustainable solutions for emergencies.
1. Why Water Purification is Essential for Survival?
Water is life, but contaminated water can quickly become a deadly threat. Without access to clean water, the human body can only survive for three days, making hydration a top priority in any survival situation. Contaminated water often contains:
- Pathogens: Harmful bacteria like E. coli, viruses such as norovirus, and parasites like Giardia. These microorganisms can cause severe gastrointestinal illnesses, dehydration, and even organ failure.
- Chemical Pollutants: Industrial chemicals and agricultural runoff can introduce toxins like pesticides, heavy metals, and fertilizers into water sources, posing long-term health risks.
- Sediments: Dirt, sand, and debris not only make water undrinkable but can also harbor hidden contaminants.
According to the Centers for Disease Control and Prevention (CDC), unsafe drinking water accounts for approximately 485,000 deaths annually worldwide due to diarrhea-related illnesses. In survival scenarios, the inability to access clean water amplifies these risks, turning even mild dehydration into a life-threatening condition.
💡 Fact: A single sip of contaminated water can carry over 1,000 bacteria, enough to cause illness in most individuals.
2. The Basics of Finding Water in the Wild
Before you can purify water, the first step is finding it. Nature often provides clues, and knowing where to look can save valuable time and effort.
- Natural Streams or Rivers: Flowing water is generally cleaner than stagnant pools because it moves continuously, reducing the concentration of harmful pathogens and debris. Look for clear, fast-moving water whenever possible.
- Rainwater Collection: Rainwater is one of the safest natural water sources, as it bypasses ground contaminants. Use tarps, leaves, or containers to collect it.
- Plants as Indicators: Thriving green vegetation often indicates the presence of water nearby. Bamboo, willows, and cattails are especially reliable markers of underground water.
💡 Tip: Always avoid stagnant water, as it is more likely to contain harmful bacteria and parasites. Water sources near urban areas, factories, or animal waste should also be considered high-risk.
How to Identify Safe Water Sources in Nature
| Water Source | Risk Level | Recommended Action |
| Flowing streams/rivers | Low | Filter or boil for safety |
| Rainwater | Very Low | Collect and use directly |
| Stagnant ponds | High | Avoid unless absolutely necessary |
| Snow/Ice | Low (when melted) | Melt and purify before drinking |
| Urban runoff | Very High | Avoid completely |
💡 Note: If you’re in a dry area, look for depressions in rocks or tree roots that may hold residual rainwater. Digging near riverbeds or valleys can also reveal underground water.
Finding and purifying water isn’t just about hydration—it’s a survival skill that can keep you alive when resources are scarce. With the right knowledge and tools, any water source can become a lifeline.
3. Proven Survival Water Purification Methods
Clean water is essential, and knowing multiple ways to purify it can save your life in emergencies. Below are tried-and-true methods to ensure you always have safe drinking water.
1. Boiling Water
Boiling is one of the oldest and most effective water purification techniques. It’s simple and requires no special tools.
- How to Do It: Heat the water until it reaches a rolling boil. Let it boil for at least 1 minute to kill harmful pathogens. If you’re at a high altitude (above 6,500 feet), boil the water for 3 minutes due to lower air pressure.
- What It Removes: Boiling kills bacteria, viruses, and most parasites.
- Limitations: This method does not remove chemical contaminants or sediments. After boiling, you might need to let the water cool and filter out debris.
💡 Fact: Studies show boiling water reduces up to 99.9% of harmful microorganisms.
However, remember that boiled water can taste flat, so adding a pinch of salt or shaking it in a sealed container can improve its flavor.
2. Portable Water Filters
Portable water filters are lightweight and easy to use, making them a favorite among hikers, campers, and survivalists.
- How to Use: Place the filter in the water source or use it like a straw. Some filters allow you to pump water into a separate container.
- Popular Brands: LifeStraw and Sawyer Mini are among the most trusted options.
- What It Removes: Most filters eliminate bacteria, parasites, and even microplastics, making them highly effective.
- Benefits: They don’t require any fuel or energy, making them an eco-friendly option. Portable filters are especially useful in emergencies when you need a quick and reliable method.
- Limitations: While portable filters can remove most pathogens, they don’t effectively eliminate viruses or chemical pollutants.
Comparison Table: Boiling vs. Portable Filters
| Feature | Boiling | Portable Filters |
| Removes Pathogens | Yes | Yes |
| Removes Chemicals | No | Partially |
| Portability | Low | High |
| Energy Required | High (fuel needed) | None |
3. Chemical Purification Tablets
Chemical tablets are a fast and reliable way to purify water in emergencies. They’re small, lightweight, and easy to carry.
- How to Use: Drop one iodine or chlorine tablet into a liter of water. Wait about 30 minutes for the chemicals to kill bacteria and viruses.
- Effectiveness: These tablets destroy harmful pathogens, including viruses, which some filters can’t handle.
- Limitations: They don’t remove sediments or chemical pollutants and can leave an unpleasant aftertaste. Some people may find the iodine taste strong, but you can reduce it by adding a vitamin C tablet after the purification process.
💡 Stat: A single tablet can purify up to 1 liter of water, making it ideal for on-the-go survival needs.
4. UV Light Purification
UV light devices, like the SteriPEN, are a modern and highly effective way to sterilize water. They use ultraviolet light to destroy pathogens.
- How It Works: Insert the UV device into your container of water. Stir gently for about 60 seconds, allowing the UV light to kill bacteria, viruses, and parasites.
- What It Removes: UV light is excellent for neutralizing pathogens but won’t remove chemical contaminants or sediments.
- Benefits: This method is fast and easy, making it great for emergencies. Unlike boiling, it doesn’t require fuel, and unlike tablets, it doesn’t alter the taste of water.
- Limitations: UV devices require batteries, so they’re not ideal if you don’t have spares. Also, the water needs to be clear because UV light can’t penetrate through sediment or debris.
💡 Fact: Studies have found UV light can neutralize up to 99.99% of waterborne pathogens, making it one of the most effective sterilization methods.
By combining these purification methods, you can ensure a steady supply of safe drinking water in any situation. For instance, use a portable filter to remove debris before boiling or use chemical tablets in conjunction with UV light for added safety.

4. DIY Survival Water Purification Methods
Knowing how to create water purification tools with simple materials can be a lifesaver in emergencies. These DIY methods are easy to follow and use items you can often find around you.
1. Homemade Charcoal Filters
Homemade charcoal filters are a practical way to remove debris, odors, and some chemicals from water. Activated charcoal is highly porous, making it effective at trapping impurities.
How to Make It:
- Take a clean plastic bottle and cut off the bottom.
- Layer the bottle with small pieces of activated charcoal, sand, and gravel.
- Pour water through the layers.
- Collect the filtered water in a clean container.
What It Removes: This method filters out sediments, odors, and some chemicals, though it won’t eliminate bacteria or viruses.
💡 Tip: After filtering, always combine this method with boiling or chemical tablets to kill harmful microorganisms.
2. Solar Purification (SODIS)
Solar water disinfection, or SODIS, is a simple and effective way to kill bacteria and viruses using sunlight.
How It Works:
- Fill a clear plastic or glass bottle with water.
- Lay the bottle in direct sunlight for at least 6 hours. In cloudy weather, extend the time to 12 hours.
Best For: Clear water with minimal sediment, as sunlight cannot penetrate murky water effectively.
💡 Fact: Studies by the World Health Organization show that SODIS can reduce pathogens by over 99%, making it a reliable low-tech solution.
Limitations: This method is slower compared to others and only works when there is strong sunlight.
3. Cloth Filtration
Cloth filtration is one of the simplest DIY methods for cleaning water. It works well as a pre-filter to remove visible dirt and debris.
How to Use:
- Take a piece of clean, tightly woven cloth (such as cotton or a T-shirt).
- Pour water through the cloth into a clean container.
- Repeat the process if the water is very dirty.
Why Use It: This method helps reduce sediment and large particles. However, it does not remove bacteria, viruses, or chemicals. Always follow this step with boiling, chemical tablets, or UV light purification for safe drinking water.
💡 Stat: Research shows that cloth filtration can remove up to 99% of sediment but does not kill harmful pathogens.
When to Use DIY Methods
| DIY Method | Best For | Limitations |
| Homemade Charcoal Filter | Removing debris, odors, and some toxins | Doesn’t kill microorganisms |
| Solar Purification | Killing bacteria in clear water | Requires sunlight; slow process |
| Cloth Filtration | Pre-filtering large debris | Doesn’t eliminate pathogens or toxins |
Combining Methods for Maximum Safety
When dealing with unknown or highly contaminated water sources, relying on a single purification method may not be enough. Combining different techniques ensures maximum safety by addressing multiple contaminants, including pathogens, chemicals, and sediments. Each method has strengths and weaknesses, so using them together can create a more reliable solution.
Why Combine Methods?
Contaminated water often contains a mix of impurities, including harmful bacteria, chemicals, and debris. For instance:
- Boiling is excellent for killing bacteria, viruses, and parasites but doesn’t remove chemicals or sediments.
- Cloth filtration removes visible debris but doesn’t eliminate microorganisms.
- Chemical tablets kill pathogens but leave a taste and don’t remove dirt.
By combining these approaches, you can ensure that water is safe, clear, and free from harmful contaminants.
Practical Example of Combining Methods
Let’s say you find water in a muddy stream. Here’s how you can combine methods:
- Cloth Filtration: Start by pouring the water through a clean piece of cloth to remove dirt and larger debris.
- Boiling: Once the water looks clear, bring it to a rolling boil for at least 1 minute (or 3 minutes at higher altitudes) to kill microorganisms.
- Chemical Tablets: After boiling, drop in a purification tablet to neutralize any remaining pathogens.
💡 Result: Clean, safe water that is free from visible debris, harmful organisms, and most toxins.
Best Method Combinations for Specific Needs
| Scenario | Combination of Methods | Why It Works |
| Muddy water with bacteria | Cloth filtration + boiling | Removes dirt and kills bacteria |
| Suspected chemical contamination | Portable filter + chemical tablets | Filters out particles and reduces chemical contaminants |
| Emergency without fuel | Solar purification + cloth filtration | Removes visible debris and kills pathogens with UV rays |
| Clear water with pathogens | Boiling + chemical tablets | Kills microorganisms and ensures extra safety |
Quick Tips for Combining Methods
- Layer Techniques: Always start with a pre-filtering step to remove visible dirt.
- Follow Up: After filtering, use a method like boiling, UV purification, or chemical treatment to kill pathogens.
- Adapt to Conditions: Choose methods based on available resources (e.g., sunlight for solar purification, charcoal for DIY filters).
💡 Pro Tip: In survival situations, it’s always better to over-purify water than to risk drinking unsafe water. Combining methods may take time, but it ensures safety and peace of mind.
By understanding the strengths of each method and how to use them together, you can confidently handle even the most challenging water purification scenarios.

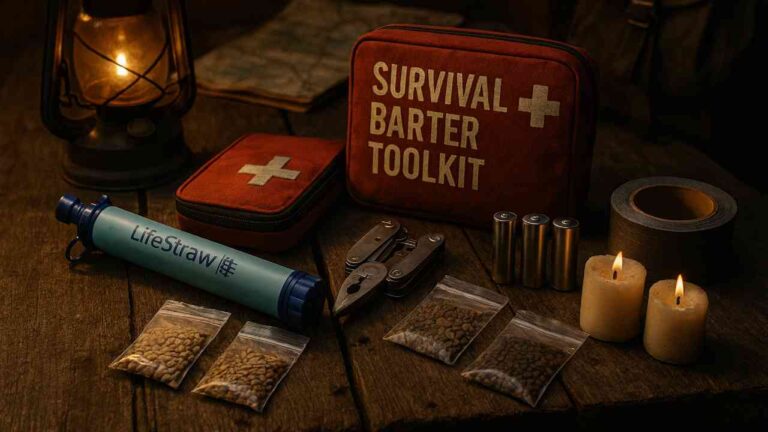
List of Must-Have Water Purification Tools
Portable Filters (LifeStraw, Sawyer Mini)
Portable water filters like the LifeStraw or Sawyer Mini are essential for survivalists and outdoor enthusiasts. These lightweight and compact tools can filter out bacteria, parasites, and microplastics from water. They are ideal for drinking directly from streams, lakes, or other freshwater sources without needing additional containers or chemicals.
Chemical Tablets (Chlorine, Iodine)
Chemical purification tablets, typically made from chlorine or iodine, are excellent for emergency use. They effectively kill bacteria, viruses, and some parasites. Just drop a tablet into water, wait for about 30 minutes, and you have safe drinking water. These tablets are portable and have a long shelf life, making them perfect for survival kits.
UV Light Pens (SteriPEN)
UV purification devices like the SteriPEN use ultraviolet light to kill microorganisms, including bacteria, viruses, and protozoa. Simply insert the UV pen into a bottle of water and stir for about 60 seconds. These pens are quick, easy to use, and particularly useful when dealing with clear water that may still harbor pathogens.
Boiling Kit (Pot and Portable Stove)
A basic boiling kit, including a lightweight pot and a portable stove, is a survival staple. Boiling water is one of the most effective ways to kill bacteria, viruses, and parasites. It requires a reliable heat source and a container to boil in, making a portable stove and durable pot invaluable during emergencies or in the wild.
DIY Materials (Charcoal, Sand, Bottles)
For those who prefer a hands-on approach, carrying DIY materials like activated charcoal, sand, and empty plastic bottles allows you to create your own water filtration system. These materials are excellent for removing sediments, odors, and some chemicals. Paired with boiling or chemical tablets, a DIY filter can be a versatile and cost-effective addition to your survival toolkit.
Advanced Water Collection Solutions
In recent years, technology has introduced groundbreaking solutions to address water scarcity in survival scenarios. Two notable systems that are revolutionizing water collection and purification are the Water Freedom System and the Air Fountain System.
1. Water Freedom System: Harnessing Humidity for Clean Water
The Water Freedom System is an innovative, solar-powered water collection method that uses condensation technology to extract water directly from the air. This eco-friendly system is ideal for regions with high humidity, making it a game-changer in water-scarce areas. The setup is easy to maintain, cost-effective, and requires minimal technical expertise, making it suitable for emergency preparedness or everyday use.
While it excels in humid climates, its performance may decline in arid regions. However, for those living in moderate to high humidity environments, it provides a sustainable solution to clean water access. With a 60-day money-back guarantee, the system ensures a risk-free trial for those looking to enhance their survival kit or household water security.

2. Air Fountain System: A Reliable Source of Atmospheric Water
The Air Fountain System offers another remarkable way to secure clean water. This device captures humidity from the atmosphere and converts it into fresh, drinkable water. Its user-friendly design and low energy requirements make it an excellent choice for eco-conscious individuals and survivalists alike.
This system is scalable, meaning it can grow with your water needs, whether for a small household or a larger community setup. It thrives in regions with moderate humidity and offers a reliable alternative to traditional water collection methods. Its low maintenance, modular design, and 60-day money-back guarantee make it a long-term investment for anyone prioritizing sustainable water access.
Why You Should Consider These Systems
Both systems provide invaluable solutions for survivalists, homeowners, and adventurers. By integrating cutting-edge condensation technology, they enable you to harness nature’s resources in sustainable and practical ways. Whether you choose the Water Freedom System or the Air Fountain System, you can enjoy peace of mind knowing your water needs are covered, even during emergencies.
How to Choose the Right Method for Your Situation
Selecting the best water purification method depends on several factors, including your environment, available resources, and time constraints. Let’s dive into these considerations to help you make informed decisions in survival scenarios.
Environment: Is the Water Source Stagnant or Flowing?
The type of water source plays a critical role in deciding your purification method. Flowing water, like streams or rivers, is usually cleaner and less likely to harbor harmful microorganisms compared to stagnant water, which often contains higher concentrations of bacteria, parasites, and debris.
For flowing water, methods like portable filters or UV light pens work well, as they’re designed to handle clearer water quickly. However, stagnant water may require multiple purification steps—such as pre-filtering with cloth to remove debris, followed by boiling or chemical tablets to eliminate pathogens.
💡 Tip: Always prioritize flowing water sources and avoid those near urban areas, industrial zones, or animal activity.
Resources: Do You Have Access to Fire or Tools?
Your available tools and materials significantly impact which method you can use. For instance, if you have access to fire and a pot, boiling is a reliable option, as it kills most pathogens. On the other hand, if you’re on the move or lack fire-making tools, a portable water filter or chemical purification tablets might be more practical.
In off-grid scenarios, investing in tools like a LifeStraw, SteriPEN, or emergency stove ensures you’re prepared for various situations. Alternatively, materials for DIY methods, like activated charcoal and plastic bottles, can be life-saving if advanced tools aren’t available.
Time: Some Methods, Like Solar Purification, Take Hours
Time is often a crucial factor, especially in emergencies where dehydration sets in quickly. Methods like boiling or using portable filters are fast and effective, taking only minutes to prepare safe drinking water. Conversely, solar purification (SODIS) requires up to 6 hours of direct sunlight to kill harmful microorganisms, making it less suitable for urgent situations.
Chemical purification tablets also have a waiting period, typically 30 minutes, but they are still faster than solar methods. When time is limited, opt for methods that provide immediate results, such as portable filters or boiling.
💡 Tip: Always weigh the urgency of your water needs against the time required for purification and choose accordingly.
Understanding these factors will help you adapt your approach to any survival scenario, ensuring you stay hydrated and safe no matter the circumstances.
Water Purification Methods and Effectiveness
| Method | Removes Pathogens | Removes Chemicals | Time Required |
| Boiling | Yes | No | 5–10 minutes |
| Portable Filters | Yes | Some | Instant |
| Chemical Tablets | Yes | No | 30 minutes |
| UV Purification | Yes | No | 1 minute |
| Solar Purification | Yes | No | 6 hours |
Conclusion
Water purification is a vital skill that every survivalist must master to stay safe and healthy in the wild. No matter where you are, access to clean water is essential for survival. Whether you’re trekking through dense forests, navigating deserts, or facing a disaster, knowing how to purify water ensures that you won’t fall victim to harmful pathogens or dehydration.
By understanding the various methods of water purification—from boiling and using portable filters to solar purification and chemical tablets—you’ll be ready for any situation. Don’t rely on a single method; always carry multiple tools and know how to combine techniques for the best results.
In any survival scenario, water is life. With the right knowledge and preparation, you can face even the toughest challenges, secure in the knowledge that you have the power to provide clean, drinkable water, no matter the conditions. Stay hydrated, stay safe, and master the art of water purification.
FAQs (Frequently Asked Ques)
What is the best way to purify water for survival?
The best way to purify water for survival depends on the available resources, environment, and urgency of the situation. However, boiling water is considered the most reliable method for purifying water in survival scenarios. Boiling kills most bacteria, viruses, and parasites. It’s simple, doesn’t require special tools (except a heat source), and is effective in most situations.
When combined with pre-filtration (using cloth or a homemade charcoal filter) to remove debris or large particles, it provides even more safety. However, if time is a factor, or if you’re unable to create a fire, portable water filters (like LifeStraw) and chemical purification tablets are great alternatives.
What are the 5 methods of purifying water?
Here are five common methods for purifying water in survival situations:
- Boiling – Heating water to a rolling boil for at least 1 minute (3 minutes at higher altitudes) kills pathogens like bacteria, viruses, and parasites.
- Portable Water Filters – Devices like the LifeStraw or Sawyer Mini filter out bacteria, parasites, and some microplastics, offering a portable and efficient purification solution.
- Chemical Purification – Using iodine or chlorine tablets to disinfect water. These tablets are effective against bacteria and viruses but may leave an aftertaste.
- UV Light Purification – UV light pens like the SteriPEN use ultraviolet radiation to sterilize water, destroying harmful microorganisms. This method is fast but requires batteries.
- Solar Purification (SODIS) – Using sunlight to kill harmful pathogens in water. It’s a passive method where you fill a clear plastic bottle with water and leave it in the sun for 6 hours. This works best for clear water with minimal sediment.
How to make a survival water purifier?
Making a simple survival water purifier involves creating a DIY filter using natural materials. Here’s how:
- Materials Needed: A plastic bottle or any container, sand, charcoal (activated if possible), and gravel or small stones.
- Steps:
- Cut the bottom off the plastic bottle and place a piece of cloth over the neck to act as a pre-filter.
- Layer the filter: Start with a layer of gravel or stones at the bottom, followed by sand, and then charcoal. This will filter out larger debris, dirt, and some chemicals.
- Pour the contaminated water through the filter and collect the filtered water in a clean container.
- Final Step: After filtering, use additional methods like boiling or chemical tablets to ensure the water is safe to drink.
How to make water safe to drink survival?
To make water safe to drink in survival situations, you need to ensure it’s free of harmful pathogens, chemicals, and physical debris. Here are the steps:
- Find Water: Look for the cleanest possible water source, preferably flowing water like rivers or streams. Avoid stagnant water, which may have more bacteria or parasites.
- Pre-filter: If the water is cloudy or contains debris, filter it through cloth or a homemade filter (sand, charcoal, gravel). This removes larger particles.
- Purify: Use one of the following methods to purify the water:
- Boiling: Boil the water for at least 1 minute (3 minutes at high altitudes).
- Portable Filters: Use a portable filter like LifeStraw to remove bacteria and parasites.
- Chemical Tablets: Add iodine or chlorine tablets to disinfect the water.
- Test for Taste: If needed, use a small amount of vitamin C or a carbon filter to improve the taste of chemically treated water.
What are the 10 ways to purify water?
Here are 10 methods you can use to purify water in survival situations:
- Boiling – The most effective method to kill bacteria, viruses, and parasites.
- Portable Filters – LifeStraw or Sawyer Mini to filter out pathogens and debris.
- Chemical Purification Tablets – Chlorine or iodine tablets for quick disinfection.
- UV Light Purification – Devices like SteriPEN to destroy microorganisms using UV light.
- Solar Purification (SODIS) – Using sunlight to sterilize water in clear plastic bottles.
- Charcoal Filtration – Create a DIY charcoal filter using sand, charcoal, and gravel to remove impurities.
- Cloth Filtration – Use a clean cloth to filter out larger debris before further purification.
- Distillation – Evaporate water and then collect the vapor to remove contaminants.
- Sedimentation – Allow particles to settle at the bottom, then pour off the clean water.
- Chemical Coagulants – Using chemicals like alum to cause dirt particles to clump together and settle.
How do you purify 100% water?
While it is impossible to guarantee that water can be 100% pure, you can significantly reduce contaminants by combining multiple purification methods. Here’s how:
- Pre-filter: Use cloth or a DIY filter to remove large particles and debris.
- Boiling: Boil the water for at least 1 minute (3 minutes at high altitudes) to kill most pathogens, bacteria, and viruses.
- Chemical Treatment: Add iodine or chlorine tablets to kill any remaining microorganisms. Allow it to sit for 30 minutes.
- Final Filtration: Run the water through a portable filter (like a LifeStraw or Sawyer Mini) to catch any remaining bacteria or parasites.
By combining these methods, you ensure that your water is as close to 100% safe as possible, free from pathogens, chemicals, and contaminants.
What is the cheapest way to purify water?
The cheapest way to purify water is by boiling it. Boiling requires only heat, which can be produced by a campfire, stove, or any heat source. All you need is a container to hold the water, making it an affordable and effective solution for eliminating bacteria, viruses, and parasites. While it doesn’t remove chemical pollutants or sediment, it’s one of the most accessible and low-cost methods for ensuring safe drinking water. Another inexpensive method is using cloth filtration, where a clean piece of cloth can be used to strain out debris before boiling or using chemical tablets.
How do survival water filters work?
Survival water filters work by passing water through a porous material that traps contaminants. The filters typically consist of activated carbon, ceramic, or other materials that physically block particles and adsorb chemicals and pathogens. When water passes through the filter, bacteria, parasites, and sediment are removed. Some filters also have layers designed to remove chlorine or heavy metals. Most portable water filters are lightweight, compact, and easy to use, making them ideal for survival situations where access to clean water is limited.
How to get clean water in the forest?
In the forest, finding clean water requires careful attention to the source and quality. Start by looking for flowing water like streams or rivers, as they are often cleaner than stagnant water. If you find stagnant water, it’s essential to purify it before drinking. You can use a portable water filter to remove contaminants or boil the water to kill harmful bacteria and viruses. Rainwater collection is another option, especially if you can use tarps or containers to collect it. For extra safety, always use cloth filtration to remove debris before purifying the water with other methods like boiling, chemical tablets, or UV light.


[…] creating your DIY emergency preparedness kit, two of the most important elements are food and water. These are the lifelines of survival, especially during emergencies where access to fresh supplies […]
[…] hydration systems allow you to carry and access water […]